What's inside
As an Amazon Associate I earn from qualifying purchases. This post may contain affiliate links at no extra cost to you.
What we cover
Best Bench Grinder Sander Combos for Workshop Projects
The best bench grinder sander combo for most home workshops is a 6-inch grinder paired with a 1-by-30-inch sanding belt, because it offers useful sharpening and deburring power without consuming the bench space or electrical capacity of a larger machine.
That recommendation changes if you regularly shape wide boards, weldments, or heavy steel. In that case, a 2-by-42-inch or 2-by-48-inch belt provides better sanding control, while a 7- or 8-inch grinder supplies more stable grinding. The important point is to judge the machine as two tools sharing one motor and frame, not as a grinder with a token sanding attachment.
As an Amazon Associate we earn from qualifying purchases at no extra cost to you.

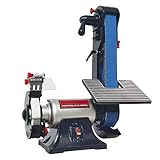


Quick Picks by Workshop Situation
| Workshop situation | Best configuration | Why it fits | Typical market range in 2026 |
|---|---|---|---|
| Occasional home repairs and tool sharpening | 6-inch wheels, 1-by-30-inch belt, 0.5 to 0.75 hp | Compact, affordable, and adequate for small steel parts and edge work | $120–$220 |
| Frequent woodworking and knife-making | 8-inch wheels, 2-by-42-inch belt, 0.75 to 1.5 hp | More belt surface, better tracking, and less bogging during shaping | $250–$550 |
| Metalworking, welding, and fabrication | 8-inch wheels, 2-by-48-inch belt, 1.5 hp or more | Handles sustained material removal and larger workpieces | $450–$900 |
| Small bench or portable workshop | 6-inch wheels, narrow 1-by-30-inch belt, under 55 lb | Smaller footprint and easier storage, with less capacity | $120–$300 |
What to Evaluate Before Buying
Motor power and usable torque
Motor horsepower is only part of the story. A compact machine advertised at 0.75 hp may perform well for intermittent deburring but slow noticeably when a belt is pressed hard against steel. Look for a motor with enough torque to maintain speed under load, thermal overload protection, and a duty rating suited to your work.
For light sharpening, sanding wood edges, and removing burrs, 0.5 to 0.75 hp is normally sufficient. A 1 to 1.5 hp motor is a better minimum for regular metal shaping. Machines above 1.5 hp make sense for production-like use, but they often need a 15-amp circuit and a heavier stand.
Variable speed is valuable on the sanding side. Lower speeds reduce heat on knife edges, thin stock, and finishes; higher speeds remove material faster. A single-speed machine can still work well, but the operator must use lighter pressure and frequent cooling dips.
Grinding-wheel size and safety hardware
A 6-inch wheel reaches useful speed quickly and keeps the machine compact. An 8-inch wheel has a larger working circumference and tends to feel smoother when sharpening long tools. It also raises the working height and usually increases the machine’s weight and cost.
Prioritize adjustable tool rests, clear eye shields, spark deflectors, and enclosed wheel guards. The tool rest should lock securely without flexing. A small gap between the rest and wheel is preferable; a large gap can trap a thin workpiece.
Check the wheel specification before purchase. Coarse wheels remove material quickly, while medium or fine wheels leave a more controllable edge. A grinder that accepts common replacement wheel sizes is easier and less expensive to maintain than one requiring proprietary abrasives.
Sanding-belt dimensions and working range
Belt dimensions determine how useful the sanding station will be. A 1-by-30-inch belt is economical and suitable for small parts, chamfering, and light woodworking. Its narrow surface can make it difficult to keep a wide board edge flat.
A 2-by-42-inch belt gives more room for two-handed work and is a strong general-purpose choice for knives, furniture hardware, and welded assemblies. A 2-by-48-inch belt provides still more abrasive area and often supports a larger platen or contact wheel, but replacement belts cost more and the machine occupies considerably more space.
Do not judge capacity by belt width alone. A useful sanding attachment should offer a flat platen, an exposed slack-belt section for curved work, and a contact wheel or nose area for inside curves. A fixed, tiny sanding surface turns the belt into little more than a powered file.
Belt tracking and tension
Reliable tracking is one of the biggest differences between a practical combo and a frustrating one. The tracking knob should make small, predictable adjustments, and the belt should remain centered when pressure changes. Crowned rollers help, but they cannot compensate for bent shafts, dirty bearings, or an incorrectly installed belt.
Spring-loaded tensioning makes belt changes quicker, but it should not be so weak that the belt slips during aggressive sanding. Inspect the belt path for sharp edges and check that the platen sits square to the rollers. A belt that repeatedly walks to one side may indicate misalignment rather than a bad abrasive.
Dust control
Grinding sparks and sanding dust require different control strategies. A spark guard and enclosed wheel housing contain some debris, but they do not replace safe positioning and suitable eye protection. On the sanding side, a 1.5- or 2.5-inch dust port is useful only if the hood actually surrounds the active sanding zone.
Fine wood dust can escape from an open belt path even when a shop vacuum is connected. For woodworking, favor a machine with a close-fitting platen hood and place the extractor hose where it does not interfere with the workpiece. For metal, never route sparks into a vacuum containing accumulated wood dust, paper, or other combustible debris.
Head-to-Head: Compact 1-by-30 Versus Full-Size 2-by-42
| Feature | Compact combo | Full-size combo |
|---|---|---|
| Typical motor | 0.5–0.75 hp | 0.75–1.5 hp |
| Grinding wheels | 6 inches, commonly 36 and 60 grit | 8 inches, commonly 36 and 60 grit |
| Sanding belt | 1 by 30 inches | 2 by 42 inches |
| Typical machine weight | 30–55 lb | 55–95 lb |
| Approximate footprint | 16 by 10 inches | 24 by 14 inches |
| Best work | Sharpening, deburring, small parts | Knife shaping, furniture hardware, regular fabrication |
| Main compromise | Limited belt width and heat buildup | Higher cost, noise, and bench-space demand |
The compact model wins when storage and price matter more than speed. The full-size model is the better long-term purchase for anyone who expects to sand every week. A wider belt distributes wear across a larger work area and gives the operator more room to correct an edge without tipping the part.
Switching Between Grinding and Sanding
Ease of switching matters more than many listings suggest. If changing modes requires removing guards, loosening several inaccessible bolts, or realigning the belt, users tend to leave one function unused.
- Unplug the machine and wait for both wheels and the belt to stop completely.
- Release belt tension using the supplied lever or tension knob.
- Remove or reposition the sanding guard and platen only as specified by the manufacturer.
- Install the belt in the correct direction, if it has a directional seam or abrasive pattern.
- Apply light tension, rotate the belt by hand, and adjust tracking until it stays centered.
- Run the machine briefly without contact, then recheck tracking before sanding.
A good combo should change modes in roughly two to five minutes once familiar. If the process takes longer, consider buying separate machines instead. Two dedicated tools can be safer and more productive when both operations are performed frequently.
Ownership Costs and Maintenance
A simple annual consumables estimate shows why belt availability matters. Suppose you use four 1-by-30-inch belts at $5 each, two grinding wheels at $18 each, and one replacement platen liner at $15. The abrasive cost is about $71 for the year. A heavy user might consume three times that amount, especially when sanding stainless steel or hardened tool steel.
The first parts to wear are usually sanding belts, platen liners, wheel dressers, tool-rest hardware, and drive belts. Bearings last longer when dust is kept away from the motor and belt rollers. Clean the belt path after each session, vacuum around ventilation openings, and inspect power cords and guards regularly.
Common mistakes include forcing the work into the belt, using a clogged abrasive, grinding on the side of a wheel not designed for side loading, and allowing a hot edge to lose its temper. Use moderate pressure, replace glazed belts, keep a water container nearby for appropriate steel work, and never use water near an unprotected electrical connection.
Final Buying Recommendation
Choose a 6-inch, 1-by-30-inch combo if your priorities are low cost, compact storage, sharpening, and occasional repairs. Choose an 8-inch, 2-by-42-inch model if sanding is a regular part of your projects and you want the best balance of belt capacity, footprint, and versatility. Move to a 2-by-48-inch machine with at least 1.5 hp for sustained fabrication or large workpieces.
Before ordering, confirm the actual belt size, replacement-belt availability, dust-port design, tracking adjustment, wheel guards, tool-rest rigidity, electrical requirements, and the time needed to change modes. Those details predict day-to-day satisfaction more reliably than horsepower printed on the front of the box.