What's inside
- Which DIY MIG welder approach makes sense?
- Decision matrix: build, convert, or buy?
- Core parts and what they must do
- Enclosure design is part of the electrical system
- Duty cycle: the calculation many builds get wrong
- Realistic cost breakdown
- Electrical and welding safety requirements
- What wears out first?
- Related Guides
- Which DIY MIG welder approach makes sense?
- Decision matrix: build, convert, or buy?
- Core parts and what they must do
- Enclosure design is part of the electrical system
- Duty cycle: the calculation many builds get wrong
- Realistic cost breakdown
- Electrical and welding safety requirements
- What wears out first?
- Related Guides
As an Amazon Associate I earn from qualifying purchases. This post may contain affiliate links at no extra cost to you.
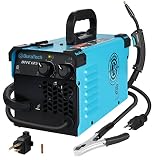
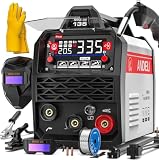
A diy mig welder is practical only for an experienced electrical builder with a sound reason to modify or assemble equipment; for most hobbyists, a certified used MIG machine is safer, cheaper, and more reliable than building a mains-powered welder from individual parts.
As an Amazon Associate we earn from qualifying purchases at no extra cost to you.

What we cover
- Which DIY MIG welder approach makes sense?
- Decision matrix: build, convert, or buy?
- Core parts and what they must do
- Enclosure design is part of the electrical system
- Duty cycle: the calculation many builds get wrong
- Realistic cost breakdown
- Electrical and welding safety requirements
- What wears out first?
- Related Guides
Which DIY MIG welder approach makes sense?
There are three realistic routes. They differ sharply in risk, cost, and welding performance.
| Build route | Typical output | Approximate parts cost | Best suited to | Main limitation |
|---|---|---|---|---|
| Salvaged transformer conversion | 90–160 A, 18–24 V DC | $180–$450 | Experienced builders with transformer and fabrication skills | Heavy, inefficient, limited voltage control |
| New laminated-core transformer build | 120–200 A, 20–28 V DC | $350–$750 | Users needing robust, repairable equipment | Transformer and rectifier sizing are difficult |
| Inverter-based conversion or integration | 140–200 A, 20–28 V DC | $300–$700 | Experienced electronics builders seeking compact size | High-frequency circuitry is less forgiving to design or repair |
| Low-voltage experimental unit | 40–80 A, 12–18 V DC | $100–$250 | Thin sheet, demonstration projects, and controlled experiments | Not a general-purpose steel fabrication welder |
These ranges exclude welding gas, wire, a regulator, replacement contact tips, and the cost of failed components. A finished entry-level machine may cost less than a serious DIY build once enclosure work and electrical protection are included.
Decision matrix: build, convert, or buy?
| Your situation | Most sensible choice | Why |
|---|---|---|
| First welding project or limited electrical experience | Buy a certified compact MIG welder | Factory insulation, thermal protection, and tested mains wiring reduce avoidable hazards. |
| Occasional repairs on 1–3 mm mild steel | Used or entry-level transformer machine | The extra weight is acceptable, and simple controls are easier to maintain. |
| Frequent work in a small shop | Certified inverter machine | Lower weight and better efficiency matter more than build novelty. |
| Strong fabrication and electrical background | Transformer conversion or carefully engineered inverter project | The project can be justified as a repairable tool, provided testing is professional. |
| Very limited budget | Do not assume DIY is cheaper | Protection devices, copper, connectors, and enclosure parts often consume the savings. |
Core parts and what they must do
Transformer-based design
A traditional MIG power source uses a mains transformer, rectifier, smoothing components, control circuitry, and a wire-feed motor. A useful general-purpose target is approximately 140 A at 20–24 V DC. That is about 2.8–3.4 kW at the welding output before losses. After allowing for rectifier, transformer, and fan losses, the input design may need roughly 3.5–4.2 kW.
A 230 V version therefore draws approximately 15–18 A at full output. On a 120 V supply, the same power can require 30–35 A, often exceeding a normal workshop circuit. Input current is not merely a plug choice: the branch circuit, breaker, disconnect, cable, and receptacle must all be correctly rated under local electrical rules.
- Transformer: use a purpose-designed welding transformer or a properly calculated laminated-core unit. A random microwave or appliance transformer is not automatically suitable; its voltage, insulation, duty cycle, and winding current may be wrong.
- Rectifier: select a bridge or discrete diode assembly with voltage and current margin. A 200 A nominal output should not be paired with a barely rated 200 A rectifier.
- Smoothing: inductors can improve arc behavior. Large electrolytic capacitors require correct voltage ratings, discharge resistors, ripple-current ratings, and physical restraint.
- Wire feeder: a geared 12 or 24 V motor, speed controller, drive rolls, liner, torch, and tension mechanism are required. Poor alignment causes bird-nesting and inconsistent wire speed.
- Controls: include separate voltage and wire-speed adjustment, a trigger relay or contactor, thermal cutout, and an over-temperature indicator.
Inverter-based design
An inverter first rectifies the mains, switches the resulting high-voltage DC at high frequency, passes it through a smaller transformer, and rectifies the welding output. This can reduce weight substantially, but it creates hazardous stored energy and fast switching voltages inside the enclosure.
Rather than designing an inverter power stage from scratch, a safer engineering route is to integrate a complete, appropriately rated inverter module with documented protection requirements. The module still needs correct input filtering, cooling, current sensing, isolation, grounding, and enclosure design. A compact circuit board does not make the project low risk.
Enclosure design is part of the electrical system
Use a rigid, flame-resistant metal enclosure with separate low-voltage and mains compartments. Keep the torch-control wiring and wire-feed circuitry physically away from uninsulated mains terminals. Fit a protective earth stud directly to the enclosure with a dedicated conductor; do not rely on a painted hinge, rivet, or sheet-metal screw for the safety-earth path.
- Protect cable entries with strain reliefs and abrasion-resistant grommets.
- Cover terminals so a dropped tool cannot bridge live conductors.
- Provide guarded ventilation openings that cannot admit fingers or conductive debris.
- Use a fan with airflow across the heat sink and transformer, not merely into a dead corner.
- Mount heavy transformers low and secure them against tipping and vibration.
- Label input voltage, fuse requirements, polarity, maximum output, and residual-charge hazards.
Do not use a wooden box as the permanent enclosure. Wood can absorb moisture, burn from a fault, and provide no predictable earth-fault path.
Duty cycle: the calculation many builds get wrong
Duty cycle is normally expressed over a 10-minute period. A machine rated at 40% duty cycle at 140 A may weld for four minutes, then require six minutes of cooling at that specified output. It does not mean four minutes of continuous operation every time the trigger is pressed.
Suppose a DIY machine is intended to weld at 120 A and is rated for 30% duty cycle. Its permitted arc time is:
10 minutes × 0.30 = 3 minutes of welding
Wire loading, repositioning, chipping, and inspection may make a short project workable, but repeated long beads can overheat the transformer, rectifier, motor, or connections. Thermal protection should interrupt welding before insulation damage occurs. A fan alone is not a substitute for correctly sized magnetic components and heat sinks.
Realistic cost breakdown
| Component | Typical range | Ownership concern |
|---|---|---|
| Transformer or inverter power module | $100–$300 | The highest-cost failure and the hardest part to substitute. |
| Rectifier, choke, capacitors, and protection | $60–$180 | Underrated parts fail rapidly under welding ripple and heat. |
| Wire feeder, motor, rolls, and liner | $70–$180 | Feed quality depends on alignment and consumable condition. |
| Torch, work lead, connectors, and earth clamp | $80–$220 | Small contact resistance creates heat and unstable arcs. |
| Enclosure, fan, controls, cable, and hardware | $80–$250 | Often underestimated because many small parts are required. |
A plausible total is $390–$1,130 before wire, gas equipment, and test instruments. This is why a DIY MIG welder is usually a project for learning, repairability, or a special specification—not a guaranteed money-saving shortcut.
Electrical and welding safety requirements
Mains voltage, charged capacitors, high fault current, hot metal, ultraviolet radiation, fumes, and compressed gas are all present. Disconnecting the plug does not immediately make an inverter safe: capacitors may retain dangerous voltage. Anyone working inside should use appropriate measurement procedures, discharge methods, insulated tools, and a verified absence-of-voltage test. If you cannot design and verify those procedures, do not open or build the power section.
- Use a correctly rated fuse or circuit breaker and a local disconnect.
- Bond the enclosure and exposed metalwork to protective earth.
- Use a residual-current device or ground-fault protection where required.
- Never weld in a wet area or with damaged leads and plugs.
- Keep gas cylinders upright, secured, and away from sparks and heat.
- Wear a correctly shaded welding helmet, flame-resistant clothing, gloves, and closed footwear.
- Provide extraction or strong ventilation; welding fumes should not be treated as harmless smoke.
- Inspect for smoldering material after welding, including behind walls and under benches.
Before connecting a new build to a workpiece, have insulation, earth continuity, leakage, polarity, open-circuit voltage, and thermal protection checked by a qualified person with suitable test equipment. A successful arc is not proof that the machine is electrically safe.
What wears out first?
Contact tips, liners, drive rolls, torch diffusers, earth clamps, and cable connections usually need attention before the main power components. Replace a tip when the wire drags or the bore becomes oversized. Clean drive rolls and keep the liner matched to the wire diameter. Excessive roller tension can deform wire and increase motor load; insufficient tension causes slipping.
The most common DIY mistakes are undersized welding cables, poor crimped terminals, inadequate cooling, no thermal cutoff, loose earth connections, and an enclosure that allows conductive dust onto live parts. If the completed cost approaches that of a certified machine, choosing the certified machine is normally the better buying decision. Build only when the engineering objective is worth the additional testing, maintenance, and responsibility.