What's inside
- Choose a TIG welder by the metal you’ll weld most: DC-only suits steel and stainless, while aluminum work calls for AC/DC.
- What matters most when comparing TIG machines
- Head-to-head: which machine type fits your work?
- Pick by material and work pattern
- How to TIG weld: a practical setup sequence
- Ownership details that are easy to overlook
- Choose a TIG welder by the metal you’ll weld most: DC-only suits steel and stainless, while aluminum work calls for AC/DC.
- What matters most when comparing TIG machines
- Head-to-head: which machine type fits your work?
- Pick by material and work pattern
- How to TIG weld: a practical setup sequence
- Ownership details that are easy to overlook
As an Amazon Associate I earn from qualifying purchases. This post may contain affiliate links at no extra cost to you.
What we cover
- Choose a TIG welder by the metal you’ll weld most: DC-only suits steel and stainless, while aluminum work calls for AC/DC.
- What matters most when comparing TIG machines
- Head-to-head: which machine type fits your work?
- Pick by material and work pattern
- How to TIG weld: a practical setup sequence
- Ownership details that are easy to overlook
Choose a TIG welder by the metal you’ll weld most: DC-only suits steel and stainless, while aluminum work calls for AC/DC.
For occasional repairs on mild steel or stainless steel, a compact DC inverter with roughly 160–200 amps is a practical starting point. If you plan to weld aluminum, look for an AC/DC machine with adjustable AC balance and enough output for the thickest parts you expect to join. Before buying, check duty cycle at the amperage you’ll actually use, input-power requirements, and whether the package includes a torch, regulator, and foot pedal.
What matters most when comparing TIG machines
- AC/DC capability: DC TIG is used for steel, stainless steel, and many other steels and alloys. Aluminum generally requires AC TIG, which helps break up the oxide layer on the surface. An AC/DC machine can weld both categories, but typically costs more than a comparable DC-only unit.
- Amperage range: A wide range gives you more control across thin sheet and heavier sections. Low minimum amperage matters for thin material; high maximum amperage matters for thicker work. Actual capacity also depends on joint design, material, preparation, and the machine’s duty cycle.
- Duty cycle: This is the percentage of a 10-minute period a welder can operate at a stated output before needing to cool. A 40% duty cycle at 200 amps means four minutes welding and six minutes cooling at that output. Duty cycle usually increases when you turn the amperage down.
- Power supply: Small machines may run on household 120-volt power, but their maximum output can be limited. A 240-volt circuit often allows higher output and longer operation. Verify the machine’s input specifications and the capacity of your circuit before purchase.
- Controls and included equipment: Adjustable pre-flow, post-flow, pulse, AC balance, and foot-pedal control can make a machine easier to match to a task. Check what is included: a torch, gas regulator, ground clamp, pedal, and suitable input plug may be separate purchases.
Head-to-head: which machine type fits your work?
| Machine type | Typical output range | Best suited to | Main compromise |
|---|---|---|---|
| 120 V DC inverter | About 10–120 A | Thin steel and stainless repairs, light fabrication, limited-space workshops | Lower output can restrict thicker work; check the duty cycle at higher settings |
| 240 V DC inverter | About 10–200 A | Regular steel or stainless projects and a wider range of material thicknesses | Does not provide AC for conventional TIG welding of aluminum |
| 120/240 V AC/DC inverter | About 10–200 A | Mixed steel, stainless, and aluminum work; users who need one machine for varied jobs | More expensive and more feature-dependent; 120 V input may limit available output |
| 240 V AC/DC machine, higher-output class | About 10–250 A | Frequent fabrication and thicker aluminum or steel jobs, subject to material and joint setup | Needs an appropriately rated supply; check weight, duty cycle, and cooling requirements |
These are representative ranges, not guarantees for every model. Compare each machine’s published output and duty-cycle figures at the same input voltage: two welders with a “200 A” label may behave quite differently when run continuously.
As an Amazon Associate we earn from qualifying purchases at no extra cost to you.


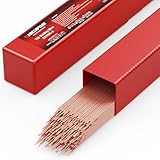

Pick by material and work pattern
| Your situation | Practical choice | Why |
|---|---|---|
| Beginner, occasional thin steel repairs, household power only | 120 V DC inverter with a low minimum amperage and foot-pedal compatibility | Lower cost and simpler setup; keep expectations modest for thick sections |
| Regular stainless or mild-steel fabrication | 240 V DC inverter around the 180–200 A class | Provides more headroom for varied work without paying for AC features you may not use |
| Aluminum projects mixed with steel or stainless | AC/DC inverter with adjustable AC balance and a pedal | AC enables aluminum TIG, while DC covers common steel and stainless work |
| Long welds or frequent production work | Machine with a strong duty cycle at your working amperage and suitable cooling | Less time waiting for thermal cut-outs; confirm the circuit and ventilation can support the workload |
Steel and stainless steel
For steel and stainless, a DC TIG machine is usually the value choice. Stainless work often benefits from precise heat control, especially on thin sections, because excessive heat can distort the part or discolor the weld area. A pedal or other responsive amperage control helps you reduce heat as a joint warms up. Cleanliness matters: remove oil, paint, rust, and other contamination before welding.
Aluminum
For conventional TIG welding of aluminum, choose an AC/DC machine. AC settings and adjustable balance help manage oxide cleaning and penetration, but they do not replace good preparation. Remove grease first, then use a dedicated stainless-steel brush on the aluminum shortly before welding. Keep the filler rod and work area clean; contamination can cause a weak or porous-looking weld.
How to TIG weld: a practical setup sequence
- Confirm the material and joint. Identify the metal and thickness, then choose the correct process mode—DC for common steel and stainless TIG, AC for aluminum TIG.
- Prepare the work. Remove coatings and contaminants, fit the pieces securely, and clean aluminum with a dedicated brush after degreasing. Preparation prevents dirt from entering the weld.
- Set up the torch and gas. Fit a suitable tungsten electrode, ceramic cup, and collet. Connect the shielding-gas regulator and check the manual for the recommended gas and flow. Use ventilation and the appropriate eye, hand, and skin protection.
- Choose conservative starting settings. Set the process, polarity, and amperage for the material and thickness using the machine manual or a reliable welding chart. On AC/DC units, begin with the manufacturer’s recommended AC settings rather than assuming one balance setting suits every job.
- Practice and adjust. Strike an arc on clean scrap of the same material, maintain a short, steady arc, and add filler as needed. Adjust heat and travel speed based on the bead and how the work responds; secure the work clamp on clean metal.
- Finish and inspect. Allow post-flow to protect the hot tungsten and weld area. Check the joint for visible defects, and let the machine cool according to its duty-cycle limits before another long pass.
Ownership details that are easy to overlook
TIG is a system, not just a power source. Budget for tungsten electrodes, cups, collets, filler rods, shielding gas, and possibly a pedal or torch upgrade. Tungsten tips and ceramic cups can chip or wear; replace damaged parts rather than trying to compensate with poor arc control. Gas leaks, a dirty work clamp, contaminated filler, and an undersized or unsuitable input circuit can all cause trouble that looks like a machine fault.
Before ordering, compare the machine’s weight and carrying handle if you will move it often, confirm the torch connection and consumables are readily available, and read the input-current requirements. For most shoppers, the decision is simple: buy DC-only for steel and stainless work, and pay for AC/DC when aluminum is a real part of the plan. Then size the machine around your actual amperage, duty-cycle needs, and available power—not its maximum-output number alone.