What's inside
- Best Welding Helmet Cheater Lenses for Clear Close-Up Work
- Quick comparison: which lens type fits your work?
- Best choices by welding situation
- Optical clarity matters more than maximum magnification
- Fit and installation across popular auto-darkening helmets
- Decision matrix for choosing power and style
- Maintenance and ownership costs
- Common buying mistakes
- Related Guides
- Best Welding Helmet Cheater Lenses for Clear Close-Up Work
- Quick comparison: which lens type fits your work?
- Best choices by welding situation
- Optical clarity matters more than maximum magnification
- Fit and installation across popular auto-darkening helmets
- Decision matrix for choosing power and style
- Maintenance and ownership costs
- Common buying mistakes
- Related Guides
As an Amazon Associate I earn from qualifying purchases. This post may contain affiliate links at no extra cost to you.
What we cover
- Best Welding Helmet Cheater Lenses for Clear Close-Up Work
- Quick comparison: which lens type fits your work?
- Best choices by welding situation
- Optical clarity matters more than maximum magnification
- Fit and installation across popular auto-darkening helmets
- Decision matrix for choosing power and style
- Maintenance and ownership costs
- Common buying mistakes
- Related Guides
Best Welding Helmet Cheater Lenses for Clear Close-Up Work
The best welding helmet cheater lens for most close-up work is a clear, 2 × 4.25-inch lens in the lowest magnification that lets you see the joint comfortably—usually +1.00 to +1.50—provided your helmet has a compatible internal lens holder or magnifier bracket.
A cheater lens is a small prescription-style magnifying lens fitted behind the auto-darkening filter. It does not change the welding shade or replace safety glasses; it enlarges the puddle, tungsten, wire, and joint when your eyes are working at a short distance. The right choice depends less on maximum power than on optical clarity, usable viewing area, and whether the lens stays aligned inside your particular hood.
As an Amazon Associate we earn from qualifying purchases at no extra cost to you.


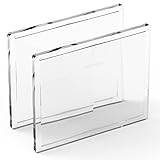
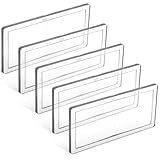
Quick comparison: which lens type fits your work?
| Lens type | Typical power | Common dimensions | Best use | Main compromise |
|---|---|---|---|---|
| Standard rectangular cheater | +1.00 to +3.00 | 2.00 × 4.25 in | General MIG, TIG, and stick work | Needs a compatible holder or retaining channel |
| Small insert lens | +1.00 to +2.50 | About 1.50 × 2.50 in | Helmets with narrow internal mounts | Less peripheral viewing area |
| Flip-up magnifier | +1.50 to +3.00 | Varies by mount | Switching between setup and welding | Heavier and more likely to move if poorly secured |
| Helmet-specific magnifier | Usually +1.00 to +2.50 | Model-specific | 3M Speedglas, Miller, Optrel, and similar systems with dedicated accessories | Higher cost and limited cross-compatibility |
Dimensions are nominal rather than universal. A lens measuring 2 × 4.25 inches may fit a common holder but still interfere with the front filter, side rails, or headgear in a particular helmet. Measure the available cavity before ordering.
Best choices by welding situation
For occasional repair work: +1.00 or +1.50 standard lens
If you weld a few times a month, a basic optical-grade acrylic or polycarbonate cheater lens is usually the sensible purchase. A +1.00 lens gives mild enlargement without greatly narrowing your focus range. A +1.50 lens is more useful for small brackets, tack welds, and short TIG joints where the work is roughly 10 to 16 inches from your face.
Look for a smooth, distortion-free center and rounded edges. Low-cost lenses can work well, but molded surfaces with visible ripples may make the arc or puddle appear to shift as you move your head.
For frequent TIG or fine fabrication: +1.50 to +2.00
TIG operators often benefit from moderate magnification because tungsten positioning and filler-wire placement demand precise visual control. A +1.50 lens is the safer starting point for most users. Move to +2.00 when the work is consistently close and small, such as thin stainless tubing or detailed aluminum assemblies.
Higher power is not automatically clearer. It reduces the distance at which objects appear sharp and can make it harder to find the joint when you look up or reposition the torch. A broad rectangular lens is generally more useful than a very strong, tiny magnifier.
For very small joints: +2.00 to +3.00, with caution
A +2.50 or +3.00 welding hood magnifying lens can help with miniature components and close inspection, but it is a specialist choice. The focused working distance becomes short, and head movement produces more noticeable blur or image shift. Many welders use a lower-power lens for welding and reserve stronger magnification for fit-up, inspection, or grinding.
Optical clarity matters more than maximum magnification
Choose a lens described as optical-grade or distortion-controlled, with a clear center and clean, polished edges. Plastic lenses are light and inexpensive, while glass lenses generally resist scratching better but add weight and can break if mishandled. Never use a cracked, deeply scratched, cloudy, or heat-damaged insert.
A cheater lens for a welding helmet sits behind the auto-darkening filter, so it must not obstruct the filter’s sensors, viewing window, or internal LCD. It also cannot compensate for a damaged front cover lens. Replace the external cover lens when spatter, pits, or haze reduce contrast.
Fit and installation across popular auto-darkening helmets
Installation differs more between helmet families than many listings suggest. Some Jackson Safety and Miller helmets accept a rectangular insert through a molded side channel or dedicated magnifier holder. 3M Speedglas helmets commonly use helmet-specific magnifier accessories rather than a universal loose lens. Optrel also offers model-specific magnifying accessories for some helmet ranges. Compatibility must be checked by exact helmet model, not only by brand.
- Remove the front cover lens if the manual requires it. This gives access without forcing the insert against the auto-darkening cartridge.
- Measure the opening. Record the usable width, height, and depth. Allow clearance for the filter, retaining clips, and nose area.
- Clean the holder. Dust or weld spatter can hold the lens at an angle, causing distortion.
- Install the lens square to your line of sight. A tilted insert can create uneven focus and may slide during head movement.
- Check the sensors and viewing area. Confirm that the magnifier does not cover arc sensors or reduce the illuminated field more than expected.
- Test before striking an arc. With the helmet on, look at a nearby joint, then at a tool several feet away. Make sure the lens stays secure and does not touch your eyelashes, nose, or filter.
Do not glue a loose cheater lens into the helmet. Adhesive fumes, heat, and residue can damage plastics and make future filter servicing difficult. If your hood has no retaining channel, use the manufacturer’s holder or a purpose-made universal mount.
Decision matrix for choosing power and style
| Your situation | Recommended starting point | Why |
|---|---|---|
| Beginner, mixed processes | +1.00 rectangular lens | Improves detail while preserving a forgiving focus range |
| Frequent TIG, close joints | +1.50 optical-grade lens | Good balance of enlargement and field of view |
| Small precision work under 12 inches | +2.00, possibly flip-up | More detail; flip-up design helps during setup |
| Shared shop helmet | Low-power removable insert | Easy to remove for users with different visual needs |
| Helmet with limited internal clearance | Helmet-specific insert | Less chance of interference with the filter or headgear |
Maintenance and ownership costs
Cheater lenses are consumables. The first parts to wear are usually the surface coating, retaining clip, and lens edges—not the magnification itself. Store the insert in a soft pouch, rinse off abrasive dust before wiping, and use clean water with a lens-safe microfiber cloth. Avoid paper towels, dry grinding-dust wiping, acetone, and general shop degreasers.
A basic rectangular lens commonly costs about $10–$25, while helmet-specific or flip-up assemblies often fall around $25–$70. If a $20 lens lasts 100 welding sessions, its cost is about $0.20 per session. Replacing it when scratches begin affecting the puddle is cheaper than compensating with poor posture, excessive brightness, or unsafe proximity to the work.
Common buying mistakes
- Choosing +3.00 because it sounds more powerful, then finding the joint blurry at normal working distance.
- Assuming every 2 × 4.25-inch lens fits every auto-darkening helmet.
- Ignoring holder depth and allowing the lens to touch the filter cartridge.
- Buying a tinted or coated insert that changes color perception without checking its purpose.
- Using the magnifier as a substitute for corrective eyewear or proper eye protection.
For most users, the best welding hood cheater lens is a removable +1.00 or +1.50 optical-grade insert matched to the helmet’s actual holder. Choose +2.00 or more only when your work is consistently close and you have confirmed the shorter focus distance. That approach gives clearer close-up work without sacrificing the broad, stable view needed for safe setup and welding.