What's inside
- Arcone Welding Lens Review: Best Shade and Clarity Options
- Quick verdict: which Arcone welding lens fits your work?
- Arcone lens shades compared
- Passive versus auto-darkening Arcone lenses
- Viewing area and helmet fit
- Clarity: what to inspect beyond the shade number
- Decision matrix for buying an Arcone welding lens
- Ownership, cleaning, and replacement costs
- Bottom line
- Arcone Welding Lens Review: Best Shade and Clarity Options
- Quick verdict: which Arcone welding lens fits your work?
- Arcone lens shades compared
- Passive versus auto-darkening Arcone lenses
- Viewing area and helmet fit
- Clarity: what to inspect beyond the shade number
- Decision matrix for buying an Arcone welding lens
- Ownership, cleaning, and replacement costs
- Bottom line
As an Amazon Associate I earn from qualifying purchases. This post may contain affiliate links at no extra cost to you.
What we cover
- Arcone Welding Lens Review: Best Shade and Clarity Options
- Quick verdict: which Arcone welding lens fits your work?
- Arcone lens shades compared
- Passive versus auto-darkening Arcone lenses
- Viewing area and helmet fit
- Clarity: what to inspect beyond the shade number
- Decision matrix for buying an Arcone welding lens
- Ownership, cleaning, and replacement costs
- Bottom line
Arcone Welding Lens Review: Best Shade and Clarity Options
The best Arcone welding lens depends on your process: choose a fixed shade 10–12 lens for predictable arc work, a darker shade 13 option for higher-amperage welding, or an Arcone auto-darkening lens when you regularly switch between preparation, tack welding, and full welds.
Quick verdict: which Arcone welding lens fits your work?
- Budget stick or MIG welding: A passive shade 10 or 11 lens is the simplest, least expensive choice when your amperage and process stay consistent.
- Frequent MIG, stick, and flux-cored work: An auto-darkening Arcone lens is more convenient because it remains light while positioning the torch or electrode.
- TIG welding: Pick the clearest auto-darkening option available in the correct shade range. Low-amperage TIG makes lens clarity and sensitivity more important than maximum darkness.
- Large outdoor or structural work: A larger viewing area and a shade 11–13 range are usually more useful than the lowest price.
- Occasional repairs: A passive replacement lens can be the better value if you do not need to see through the helmet before striking an arc.
Arcone lens shades compared
Shade numbers describe how much visible light the filter transmits: the higher the number, the darker the lens. The correct shade is determined primarily by welding process, amperage, electrode size, and arc intensity. Do not select a lighter shade simply because it makes the puddle easier to see.
As an Amazon Associate we earn from qualifying purchases at no extra cost to you.


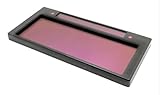

| Welding situation | Practical shade range | What to prioritize | Best Arcone lens type |
|---|---|---|---|
| Low-amperage TIG | Shade 8–10 | Low-light sensitivity and clear puddle visibility | Auto-darkening, adjustable range |
| MIG on thin steel | Shade 10–11 | Balanced brightness and face coverage | Passive or auto-darkening |
| Stick welding | Shade 10–13 | Stable darkening and resistance to spatter damage | Passive fixed shade or auto-darkening |
| Flux-cored welding | Shade 10–13 | Reliable arc response and a larger viewing area | Auto-darkening with a broad shade range |
| High-amperage work | Shade 12–14 | Maximum practical protection and full face coverage | Dark fixed lens or industrial auto-darkening lens |
These are starting ranges, not a substitute for the shade chart supplied with the helmet or filter. If the arc feels uncomfortably bright, stop and increase the shade. A proper filter should also be marked for the applicable safety standard; look for current compliance markings on the filter and helmet rather than assuming that every replacement lens is interchangeable.
Passive versus auto-darkening Arcone lenses
Passive lenses
A passive Arcone welding lens has one fixed shade. It has no batteries, switching electronics, or delay controls, so there is little to fail. This makes it attractive for occasional stick welding, training, and jobs where the helmet is lowered before every arc.
The trade-off is workflow. A dark passive lens makes it difficult to locate a joint, align a tungsten electrode, or inspect a tack without lifting the helmet. Repeatedly raising and lowering the helmet can also make fit less consistent and slows work.
Auto-darkening lenses
An auto-darkening lens normally remains at a light state, then switches to its welding shade when sensors detect the arc. Useful controls may include shade selection, sensitivity, and dark-to-light delay. These features matter most for TIG, short welds, and projects requiring frequent repositioning.
Auto-darkening is not automatically clearer. A filter can have a suitable dark shade but still show a green cast, haze, uneven brightness, or distracting sensor behavior. Check the optical-class markings and the manufacturer’s viewing and shade specifications. A commonly seen optical classification uses four categories for optical quality, light diffusion, luminous transmittance variation, and angle dependence; lower numbers indicate better performance in those categories.
Viewing area and helmet fit
Viewing dimensions are often more important than shoppers expect. A compact replacement lens around 2 by 4.25 inches can fit many traditional small-window helmets, but it offers less peripheral awareness than a larger filter. Common auto-darkening cartridges may use approximate viewing areas from 3.5 by 1.4 inches to more than 3.9 by 2.4 inches, depending on the helmet design. Confirm the cartridge opening, not merely the outside dimensions of the helmet.
| Helmet or lens format | Approximate viewing dimensions | Typical advantage | Typical limitation |
|---|---|---|---|
| Small passive filter | About 2.00 × 4.25 in | Low cost and broad replacement availability | Narrower working view and no pre-arc visibility |
| Standard auto-darkening cartridge | About 3.50 × 1.40 in | Fits many conventional helmets | Less vertical view than panoramic designs |
| Large-view cartridge | About 3.90 × 2.40 in or larger | Better awareness when following long seams | Usually costs more and needs a matching shell |
Before buying an Arcone welding lens, measure the opening in the helmet’s retaining frame. Measure width, height, and corner shape, then check the retaining clips or gasket depth. A lens that is only a few millimeters too large may not seat correctly; a lens that is too small can leave gaps around the filter. Never modify the cartridge or force it into a shell.
Clarity: what to inspect beyond the shade number
- Optical class: Lower optical-class numbers generally mean less distortion and more uniform viewing.
- Color perception: A truer-color filter can make the puddle, tungsten, and surrounding metal easier to distinguish.
- Light-state visibility: This matters when setting up a joint or inspecting a tack before the next weld.
- Viewing angle: A lens that darkens unevenly when viewed from the side can be frustrating in tight positions.
- Sensor behavior: For TIG, use adequate sensitivity so the filter responds to a weaker arc without staying dark unnecessarily between welds.
- Delay: A short delay is useful for rapid tack work; a longer delay can be more comfortable after a hot, bright weld.
Lens clarity cannot compensate for an incorrect shade. Optical performance and arc protection are separate decisions: choose a safe shade first, then select the clearest filter available in that shade range.
Decision matrix for buying an Arcone welding lens
| Your situation | Recommended choice | Why | What to avoid |
|---|---|---|---|
| Under 10 welding sessions per year | Fixed passive lens | No batteries or electronic controls to maintain | Paying for features you will rarely use |
| Several processes each week | Auto-darkening, adjustable shade | Faster setup and easier switching between processes | A single fixed shade for every job |
| Beginner learning joint alignment | Clear light-state auto-darkening lens | Helps position the torch before the arc | Small, hazy viewing windows |
| Frequent overhead or out-of-position work | Large-view lens with secure headgear | Maintains coverage while the helmet shifts less | Loose suspension or an ill-fitting shell |
| High-amperage structural welding | Appropriately dark industrial filter | Prioritizes protection and coverage over convenience | Choosing by viewing size alone |
Ownership, cleaning, and replacement costs
The outer cover lens usually wears before the welding filter. Spatter, grinding dust, fingerprints, and scratches reduce clarity and can make a good Arcone welding lens appear defective. Replace a scratched, crazed, pitted, or heat-damaged cover lens rather than polishing it aggressively. Use the cover size specified for the helmet; an improvised plastic sheet may not provide the required impact protection or optical quality.
Clean the cover with a soft microfiber cloth and a mild lens-safe cleaner. Do not use abrasive compound, solvent, paper towels, or a wire brush. Keep the helmet away from direct heat and store auto-darkening cartridges where batteries will not corrode. If the filter flickers, fails to darken, shows a persistent dark area, or behaves inconsistently, remove it from service and replace it.
A simple ownership calculation favors the right type rather than the cheapest purchase. For example, if a passive lens costs $10 and is used for 20 repair sessions, its lens cost is about $0.50 per session. An auto-darkening cartridge costing $60 used for 120 sessions also costs about $0.50 per session, before cover lenses and batteries. The auto-darkening option may still be the better choice if it prevents setup delays or encourages consistent helmet use.
Bottom line
Choose an Arcone welding lens by shade and helmet compatibility first, then compare optical clarity and viewing dimensions. A passive shade 10–11 lens is economical for predictable work; an adjustable auto-darkening lens is more versatile for mixed MIG, stick, flux-cored, and TIG jobs. Measure the helmet opening, verify the filter markings, use the shade recommended for your process, and protect the cartridge with clean, regularly replaced cover lenses.