Our Top Picks
 ARCCAPTAIN MIG205MP MIG Welder with Plasma CutterMIG205MP17.3 x 7.88 x 12.7 Inches46.3 poundsCheck on Amazon

What's inside
As an Amazon Associate I earn from qualifying purchases. This post may contain affiliate links at no extra cost to you.
Everyone building a metal shop wants to buy the welder first. Then they discover they cannot cut stock square, cannot clamp it, cannot clean it, and their beautiful welds are joining badly prepared parts at slightly wrong angles.
The welder is the loudest purchase in a new shop and the least decisive one. A mid-range machine on a flat table, fed by square cuts and held by enough clamps, produces work that looks professional. An expensive machine on a wobbly bench, fed by ends cut three degrees off, produces gaps you spend the rest of the day filling.
As an Amazon Associate we earn from qualifying purchases at no extra cost to you.


Here is the order that produces a shop that actually works.
What we cover
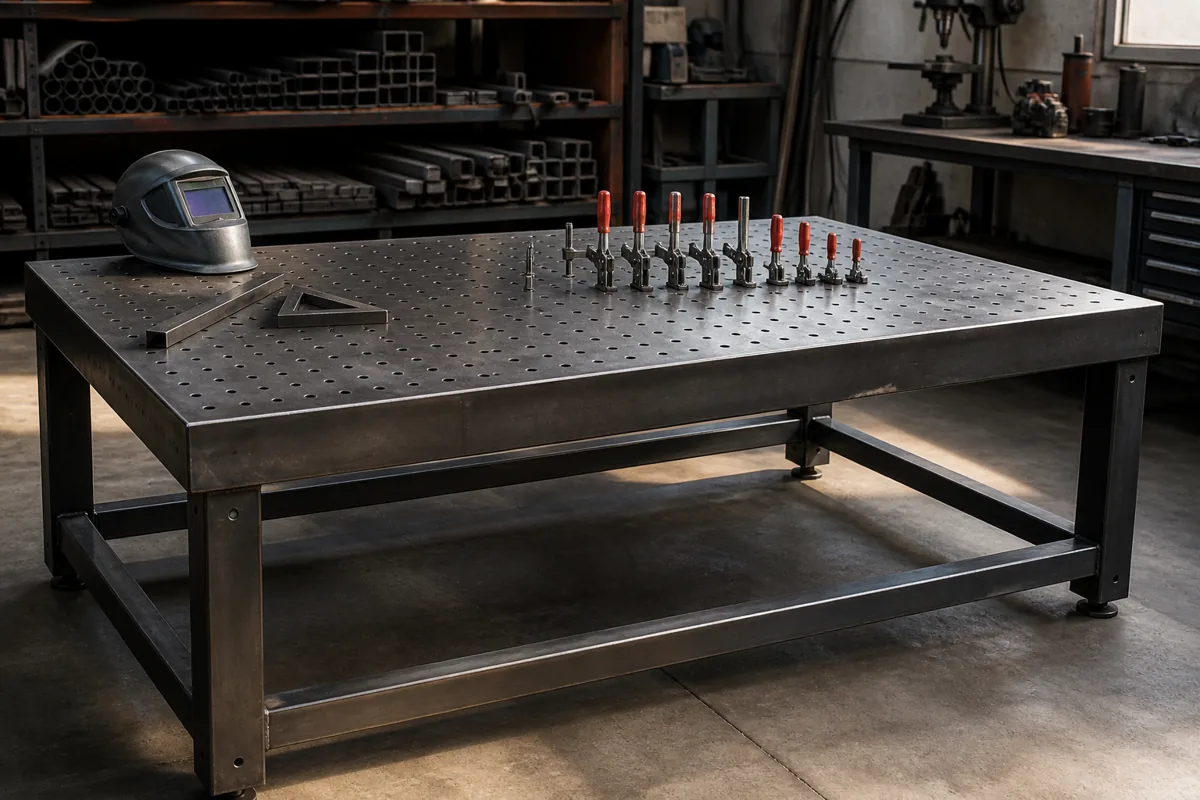
1. A solid steel table
Flat, heavy and something you can clamp to and ground to. This is the foundation of every accurate assembly you will ever build. A welding table with holes for fixture clamps is ideal; a heavy steel plate on a frame is a fine start.
Weigh the criteria in this order: top thickness, size, clamping access, mobility. Thickness is the one you cannot fix later. Quarter inch plate is the honest minimum for general work; three eighths and up stops moving altogether and earns its cost if you hammer on the surface or build repeatable fixtures. Thin tops warp the first time you run a long bead near an edge, and a warped reference surface puts quiet error into everything you build on it afterwards.
Size fights floor space and floor space wins. Around 30 by 48 inches handles more work than people expect, and stands to support overhang cost less than a table you have to walk around. Leave the top overhanging the frame an inch or two so clamps have somewhere to bite. Build it yourself unless you are short on time or want a holed fixture top — it is the ideal first project, and slightly ugly still works.
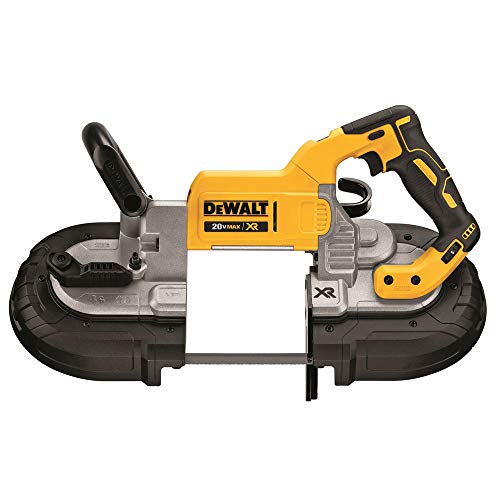
2. Cutting: a portable band saw
Square, clean, cold cuts. If your parts are cut square, everything downstream is easier.
The alternatives are an abrasive chop saw, fast and cheap but leaving a hot burred end and abrasive dust across the room, and a grinder with a cut-off wheel, which cuts anything but is only as accurate as your hand.
What separates a good saw from a bad one is not motor power, it is shoe rigidity and blade tracking. Cheap saws flex under hand pressure, the blade wanders, the cut bows, and you are grinding ends square again. Look for variable speed, a throat deep enough for the largest section you actually buy, a flat stable shoe, and a stand conversion so you can work with a hand free. Blades matter more than the saw: match tooth pitch so at least three teeth engage in the wall thickness. Skip the band saw only if you cut thick plate almost exclusively.
Portable band saws
Square cuts, minimal cleanup, quiet enough to use in a residential garage. The most underrated purchase in a new shop.
3. Grinding and finishing
An angle grinder with a brake, a stack of flap discs and cut-off wheels, and a wire wheel for mill scale. Metal prep is most of the work in fabrication and this is the tool that does it.
A 4.5 inch grinder is light, controllable and takes the cheapest consumables; a 5 or 6 inch machine removes metal faster but tires your arms and is clumsy for fine blending. Most shops end up with both, which is not waste — the cheapest speed upgrade in fabrication is owning two grinders and never swapping discs mid-job. Insist on a paddle switch, a brake that stops the disc when you let go, and a guard that moves without tools.
Angle grinders and flap discs
Flap discs blend welds; cut-off wheels separate stock; wire wheels clean rust. Keep all three in stock.
4. Clamps and squares
Magnetic squares, locking C-clamps, welding pliers. You cannot hold parts in position with hope, and tack welds do not fix bad alignment — they lock it in.
Magnetic squares are a third hand, not a fixture. They lose grip through paint, slide under heavy stock and weaken with heat cycles. Real holding comes from locking C-clamps with swivel pads, F-clamps for anything overhanging the table, and pliers for pulling sheet into line. Buy in pairs. The usual failure is owning just enough clamps to hold one joint but not the whole assembly, so you tack in a position you never checked.
Welding clamps and magnetic squares
Locking clamps and 90-degree magnets. Buy more than feels reasonable — every fabricator says the same thing.
5. Layout and measuring
A combination square, a machinist square, soapstone or a silver pencil, a centre punch, and a decent tape. Layout errors cost more than any tool on this list.
The trap is assuming a square is accurate because it is new. Draw a line along a straight edge, flip the square, draw again; if the lines diverge the square is wrong, and so is everything built from it. Keep one machinist square as a bench reference and check the working tools against it. Measure from a single datum rather than end to end to end, because hook slop and cumulative error stack up over a long piece.
6. Then the welder
MIG for speed and general fabrication, TIG for control and thin material, stick for outdoor and dirty steel. A multiprocess machine covers all three and is where most home shops land.
Read the duty cycle at the amperage you will really use, not the headline figure. A machine rated modestly at full output can be comfortable in the middle of its range, where most fabrication happens, and that is the number that decides whether you weld or stand waiting. Input voltage is the other hard limit: 120 volts covers sheet and light tube, while thicker material in a single pass wants 240 volts and a circuit that can feed it. Sort the outlet before the machine.
Feed quality decides how a MIG feels: metal drive rolls, the right liner and steady tension give a stable arc, while a cheap feeder stutters and you will blame your own technique. Multiprocess suits most home shops, with one caveat worth knowing now — TIG on many of them is DC lift-start only, no pedal and no AC, so no aluminium. If aluminium matters to you, plan for AC TIG or a spool gun.
Multiprocess welders
MIG for most work, stick for outdoors and rust, TIG when it matters. Check duty cycle at the amperage you will actually use.
7. Safety infrastructure — not last in importance
This is seventh because you can buy it last, not because it matters least.
- ✔ Fire extinguisher rated for the materials you keep, within arm’s reach
- ✔ Ventilation or fume extraction, especially for galvanised or coated steel
- ✔ Welding screens if anyone else shares the space
- ✔ Fire-resistant clothing and proper boots
- ✔ A clean floor — sparks find everything flammable
The helmet earns its own paragraph. An auto-darkening hood with a sensible shade range, several arc sensors, grind mode and a lens big enough to see the joint costs more than the bargain option and repays it in weld quality, because you stop flinching and can see where the puddle is going. Add a respirator for coated steel, a heavy gauntlet for MIG and stick, a thinner glove for TIG.
Buying it in stages
Few people buy all of this at once. If the money arrives in instalments: table, grinder, clamps, layout tools and PPE first, with cut-off wheels doing the sawing; band saw and welder second, when you can start building real assemblies; drill press and bench vice third. Everything in the first stage improves the welds you make later, and none of it becomes obsolete when the machine is upgraded.
Realistic budget
A capable home fabrication shop lands around $2,000–3,500: table, band saw, grinder, clamps, layout tools, welder and PPE. Spending $2,500 on a welder and $200 on everything else produces worse work than the reverse.
Proportion is a better check than absolutes. If the welder eats much more than a third of the total, the shop around it is starved. Consumables are a permanent line — discs, wire, gas, tips, blades, gloves — and the cost people forget. The used market is generous on tables, vices and grinders, which are hard to wear out, and unkind on helmets, respirators and regulators, where the failure mode is your face.
Four mistakes that show up in the first month
- Buying heat before accuracy. No welder corrects a joint that does not fit.
- Trusting a new square. Run the flip test before you cut a whole project to it.
- Tacking too early. Clamp, check diagonals, then tack. A tack is a decision, not a suggestion.
- Welding over mill scale or paint. Grind back to bright steel, and keep enough discs on the shelf that you never negotiate with yourself about it.
FAQ
MIG or TIG first? MIG. Faster to learn, covers more work, more forgiving on imperfect prep. Learn TIG when the welds start being visible on purpose.
Can I weld in a home garage? Yes, with ventilation, fire precautions, and awareness of what is on the other side of the wall. Sparks and hot slag find sawdust, insulation and stored fuel, so clear the floor first.
Gas or flux-core? Gas MIG for clean indoor work; flux-core for outdoors and dirty steel. Many machines do both, and gas adds a cylinder and regulator to the bill.
Do I need a plasma cutter? Not to start. A grinder and a band saw cover almost every straight cut; plasma earns its place once you cut curves and holes often enough to resent doing it by hand.
Price the shop setup →