What's inside
- Millermatic welding machines compared at a glance
- Millermatic 141: the choice for light sheet metal
- Millermatic 211: the best all-rounder
- Millermatic 252: output for sustained fabrication
- Pick by your actual situation
- A useful duty-cycle calculation
- Consumables, setup, and ownership realities
- Which Millermatic welding machine should you buy?
- Millermatic welding machines compared at a glance
- Millermatic 141: the choice for light sheet metal
- Millermatic 211: the best all-rounder
- Millermatic 252: output for sustained fabrication
- Pick by your actual situation
- A useful duty-cycle calculation
- Consumables, setup, and ownership realities
- Which Millermatic welding machine should you buy?
As an Amazon Associate I earn from qualifying purchases. This post may contain affiliate links at no extra cost to you.
Choose the Millermatic 141 for light 120-volt sheet-metal work, the Millermatic 211 for the broadest mix of home, repair, and fabrication jobs, and the Millermatic 252 for frequent high-output structural work with 230-volt power.
As an Amazon Associate we earn from qualifying purchases at no extra cost to you.


What we cover
- Millermatic welding machines compared at a glance
- Millermatic 141: the choice for light sheet metal
- Millermatic 211: the best all-rounder
- Millermatic 252: output for sustained fabrication
- Pick by your actual situation
- A useful duty-cycle calculation
- Consumables, setup, and ownership realities
- Which Millermatic welding machine should you buy?
Millermatic welding machines compared at a glance
The three machines occupy different roles rather than being simple good-better-best versions of the same tool. The 141 is a compact 120-volt MIG welder for thin steel. The 211 adds dual-voltage flexibility and substantially more output. The 252 is a larger 230-volt machine designed to sustain heavier welding for longer periods.
| Model | Input power | Rated output and duty cycle | Maximum single-pass steel thickness | Typical wire range | Machine weight |
|---|---|---|---|---|---|
| Millermatic 141 | 120 V, 20 A circuit | 90 A at 20% | About 3/16 in | 0.023–0.030 in solid wire; up to 0.035 in flux-cored | About 51 lb |
| Millermatic 211 | 120/240 V, dual voltage | 150 A at 30% | About 3/8 in | 0.023–0.035 in solid wire; up to 0.045 in flux-cored | About 41 lb for the power source |
| Millermatic 252 | 230 V | 200 A at 60% | About 1/2 in | 0.023–0.045 in solid wire; larger wire capability depending on setup | About 87 lb |
Ratings vary slightly by production revision, configuration, and whether a listed weight includes accessories or running gear. Treat the nameplate and manual for the exact machine as authoritative. “Maximum thickness” also assumes proper joint preparation, multiple passes where appropriate, clean base metal, and a suitable power source; it is not a promise that one pass will produce a code-quality structural weld.
Millermatic 141: the choice for light sheet metal
The Millermatic 141 welding machine makes sense when the work is mostly automotive patch panels, light brackets, small carts, thin tubing, and general household repair. It plugs into ordinary 120-volt service and is easier to place on a bench or carry to a driveway than the larger machines.
Its practical limit is not just the 3/16-inch material rating. The 120-volt input limits available amperage, and the 20% duty cycle means the machine may need frequent cooling pauses at its rated output. It is comfortable on approximately 18-gauge through 1/8-inch steel, while thicker material requires careful beveling, short welds, and often multiple passes.
For beginners, the 141 can be a forgiving entry into solid-wire MIG welding, particularly with shielding gas and 0.023-inch wire. It is less attractive if you expect to weld thick angle iron regularly, use long beads, or add a spool gun for aluminum work. A lower purchase price can become false economy if the machine is routinely operated at its ceiling.
Millermatic 211: the best all-rounder
The Millermatic 211 is the strongest fit for buyers who are unsure what their future projects will require. Its dual-voltage input lets it run from 120 volts for portable repair work or 240 volts when more output and better arc performance are available. That flexibility is the main reason to choose it over the 141.
On 240 volts, the 211 has enough capacity for many 1/4-inch fabrication jobs and can approach its approximately 3/8-inch single-pass rating with the right wire, gas, joint design, and technique. On 120 volts, it remains useful for thinner material, but its output and duty cycle are more constrained. If you own only a standard household outlet today but may install a 240-volt circuit later, the 211 avoids buying twice.
The 211 is also a sensible choice for an experienced hobbyist who welds intermittently: trailer repairs, farm equipment, gates, small structural frames, and automotive work. It is portable enough for field use, yet substantially less restricted than a compact 120-volt-only model.
Millermatic 252: output for sustained fabrication
The Millermatic 252 is aimed at a different buyer: someone with reliable 230-volt power who regularly welds thicker steel, makes long beads, or values production speed more than portability. Its 60% duty cycle at a high rated output is the critical advantage. In a 10-minute period, a 60% duty cycle permits approximately six minutes of arc time followed by four minutes of cooling at the stated rating.
That does not mean the 252 can weld continuously. Duty cycle falls when output is increased, and actual welding time includes starts, stops, repositioning, cleaning, and fit-up. Still, the 252 wastes less time waiting for thermal protection than the 141 or 211 during repetitive fabrication.
Its drawbacks are size, weight, installation requirements, and operating cost. A suitable 230-volt circuit, plug, cable, gas cylinder, and sturdy cart may add meaningful expense. For occasional home repairs, the capacity will rarely be used enough to justify those compromises.
Pick by your actual situation
| Your situation | Best choice | Why |
|---|---|---|
| Mostly 20-gauge to 1/8-inch sheet metal; 120-volt outlet only | Millermatic 141 | Lowest infrastructure cost and adequate output for thin work |
| Mixed repairs, tubing, brackets, and occasional 1/4-inch steel | Millermatic 211 | Dual voltage and more headroom without the weight of the 252 |
| Frequent 1/4- to 3/8-inch fabrication or long weld cycles | Millermatic 252 | Higher output and 60% duty cycle reduce cooling interruptions |
| Limited storage or frequent transport | Millermatic 141 or 211 | Both are more practical than the heavy 230-volt machine |
| Budget favors future flexibility over minimum entry price | Millermatic 211 | It can use existing 120-volt service and later benefit from 240 volts |
A useful duty-cycle calculation
Suppose a project requires 24 minutes of actual arc time at each machine’s rated output. The 141, rated at 20%, would need roughly 8 minutes of welding per 10-minute cycle and 32 minutes of cooling time spread across four cycles. The 211, at 30%, would need about 80 minutes of cooling across eight 10-minute cycles. The 252, at 60%, could theoretically complete the arc time in four cycles with about 16 minutes of cooling.
This is an idealized comparison, not a production schedule. Fit-up and repositioning reduce the significance of the difference for small projects. On repetitive frames or production batches, however, the 252’s duty-cycle advantage can save more time than its higher purchase and installation cost.
Consumables, setup, and ownership realities
For clean mild steel, 75% argon and 25% carbon dioxide shielding gas with solid wire is usually the easiest setup for attractive, low-spatter welds. Use smaller 0.023-inch wire on thin sheet metal to reduce burn-through risk. Larger 0.030- or 0.035-inch wire is more appropriate as material thickness and required deposition increase.
- Replace contact tips when the wire begins to drag, arc inconsistently, or fit loosely through the tip.
- Keep the gun liner clean and replace it when feeding becomes erratic despite correct spool tension.
- Inspect drive rolls for the correct wire profile and remove accumulated dust or metal particles.
- Clean mill scale, paint, oil, and rust from the joint; machine capacity cannot compensate for contaminated steel.
- Check the work clamp and cable connections. A poor return path causes unstable arcs and unnecessary heat in connectors.
- Do not coil excess welding cable tightly against the machine or block ventilation openings.
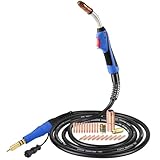
The consumables often show wear before the power source does. Contact tips, liners, drive rolls, gas nozzles, and gun triggers receive the most routine abuse. A machine that feeds wire poorly is not necessarily suffering an electronic failure; incorrect spool tension, a worn liner, dirty wire, or a partially blocked nozzle is more common.
Which Millermatic welding machine should you buy?
Buy the Millermatic 141 if your work is overwhelmingly thin sheet metal and your electrical service is limited to 120 volts. Choose the Millermatic 211 if you want one versatile Millermatic welding machine for home fabrication, repair, and future expansion to 240 volts. Select the Millermatic 252 only when you have 230-volt power and regularly need thicker material, longer weld cycles, or faster repetitive work.
For structural applications such as load-bearing trailers, lifting equipment, or building components, machine size is only one part of the decision. Joint design, procedure, welder qualification, inspection, and applicable codes matter as much as amperage. The most capable machine is not automatically the right machine unless the complete process matches the job.