What's inside
As an Amazon Associate I earn from qualifying purchases. This post may contain affiliate links at no extra cost to you.
What we cover
Best MIG Welders for Thin Metal
The best MIG welder for thin metal is a 115-volt machine with stable low-amp control, a true minimum output near 25–30 amps, and the ability to run 0.023- or 0.024-inch solid wire with shielding gas. For occasional sheet-metal repairs, the Hobart Handler 140 and Miller Millermatic 140 are strong choices; for more frequent fabrication, choose a 180-amp machine with finer voltage adjustment and a longer duty cycle.
What matters most for MIG welding thin metal
Sheet metal burns through when the arc delivers more heat than the material can absorb. Maximum amperage matters less than the welder’s minimum output, voltage control, wire size, and your ability to make short, intermittent welds.
As an Amazon Associate we earn from qualifying purchases at no extra cost to you.

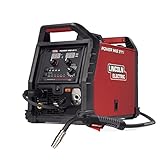

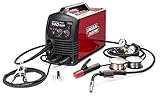
- Low-amp control: Look for a usable range beginning around 25–30 amps. A low minimum setting gives you a better chance of welding 20- to 24-gauge steel without instantly opening a hole.
- Wire size: Use 0.023- or 0.024-inch solid ER70S-6 wire for thin steel. It melts with less current than 0.030-inch wire and is easier to control on automotive panels and light brackets.
- Voltage settings: More incremental settings make it easier to tune the arc. A machine with four broad taps can work well, but a continuously adjustable voltage control is more forgiving when metal thickness changes.
- Duty cycle: Duty cycle is the time a welder can operate during a 10-minute period at a stated output. It is not a direct thin-metal quality rating, but a higher duty cycle helps prevent thermal shutdown during repeated tack welds.
- Gas compatibility: For the cleanest welds on mild-steel sheet, use 75% argon/25% carbon dioxide shielding gas. Flux-cored wire is useful outdoors but creates more spatter and heat, making it a poor first choice for delicate panels.
Head-to-head comparison
| Welder | Input | Output range | Thin-wire support | Duty cycle | Best use |
|---|---|---|---|---|---|
| Hobart Handler 140 | 120V | 25–140A | 0.023–0.030 in solid wire | 20% at 90A | Home repairs and automotive sheet metal |
| Miller Millermatic 140 | 120V | 30–140A | 0.023–0.030 in solid wire | 20% at 90A | Easy setup and regular light fabrication |
| Lincoln Electric POWER MIG 180 | 120V | 30–180A | 0.023–0.030 in solid wire | 20% at 125A | Users needing more headroom for thicker steel |
| 140–180A inverter MIG type | 120V or dual-voltage | Approximately 20–180A | 0.023–0.035 in solid wire | 20–35% at rated output | Portable work and limited shop space |
The Hobart Handler 140 is a practical mig welder for thin metal because its 25-amp minimum is low enough for light-gauge steel and its simple controls are easy to learn. The Miller Millermatic 140 offers similar capacity with a polished setup experience and consistent wire-feed design. The Lincoln POWER MIG 180 is the better choice if thin panels are only part of the job and you also expect to weld 1/4-inch material with the correct preparation and multiple passes.
Best choice by situation
| Your situation | Recommended type | Why |
|---|---|---|
| Lowest practical cost for occasional repairs | 120V, 25–140A transformer MIG welder | Simple, serviceable, and adequate for 20- to 24-gauge steel |
| First welder and limited experience | 120V machine with preset voltage chart | Reduces setup decisions while you learn travel speed and stickout |
| Frequent bodywork or fabrication | 140–180A machine with fine voltage adjustment | Better tuning across different sheet thicknesses and joint gaps |
| Small workspace or mobile work | Compact inverter with 0.023-inch wire capability | Lower weight and often better control at low output |
| Mixed thin and medium-thickness steel | 180A machine with a spool-gun-ready or dual-voltage design | More capacity without giving up a low-current setting |
How to set up a MIG welder for thin steel
1. Select the smallest suitable wire
Install 0.023- or 0.024-inch ER70S-6 solid wire and use a matching contact tip. Set the drive-roll groove for that diameter. A mismatched groove can flatten the wire, cause slipping, or produce inconsistent feeding that looks like an electrical problem.
2. Use short-circuit transfer
On a 120-volt machine, thin steel is normally welded using short-circuit transfer at low voltage and moderate wire speed. Start with the welder’s chart, then make test beads on the same thickness and coating condition as the project. Do not copy a setting from clean new steel when welding painted or rusty material.
3. Prepare the joint carefully
Remove paint, rust, oil, and galvanized coating from the weld area. Keep the joint gap small and consistent. A large gap forces you to add more metal and heat, while a tight fit lets short tacks join the panel with less risk of burn-through.
4. Tack before welding continuously
Place small tacks several inches apart, alternating sides so heat does not accumulate in one area. Allow each tack to cool briefly, then fill the spaces with short welds. A continuous bead is usually the wrong technique for automotive sheet metal because it distorts the panel and concentrates heat.
5. Keep the arc short
Maintain roughly 3/8 inch of electrode stickout and a short arc. Excessive stickout preheats the wire outside the arc, reducing penetration and making the weld unstable. Pulling the gun too slowly adds heat; use a steady travel speed and pause only long enough to tie into both edges.
Worked example: why 0.023-inch wire helps
Suppose you are joining 22-gauge steel, approximately 0.030 inch thick. A 0.030-inch wire has nearly 70% more cross-sectional area than 0.023-inch wire, calculated from the square of the diameter: 0.030² divided by 0.023² is about 1.70. In practical terms, the larger wire generally needs more current to melt at the same feed rate. The smaller wire gives a useful low-heat operating window, although correct settings and travel technique still matter more than diameter alone.
Ownership costs and durability
The parts that wear first are usually contact tips, drive-roll surfaces, the gun liner, and the gas nozzle. Keep several tips in the correct wire size because a tip enlarged by spatter can cause arc wandering. Replace a liner when feeding becomes rough after cleaning the gun and checking the drive tension.
Clean spatter from the nozzle regularly and keep the wire spool covered when the machine is stored. Moisture or surface rust on wire increases feeding problems and porosity. Do not overtighten the drive tension: enough pressure is needed to feed smoothly, but excessive pressure can deform small wire before it reaches the liner.
A basic 120-volt MIG setup commonly costs about $500–$1,000 for the machine, regulator, gun consumables, and initial wire, before gas-cylinder ownership or rental. A compact inverter may cost more or less depending on included accessories, but the cheapest machine is not always the lowest-cost option if it lacks compatible 0.023-inch tips or has difficult-to-source liners.
Bottom line
Choose the Hobart Handler 140 or Miller Millermatic 140 when your priority is clean, manageable welding on thin steel with a standard 120-volt outlet. Choose the Lincoln POWER MIG 180 when you need additional capacity for thicker work. Whichever machine you buy, prioritize a low minimum amperage, 0.023- or 0.024-inch solid wire, 75/25 shielding gas, careful fit-up, and short intermittent welds. Those choices prevent burn-through more reliably than maximum amperage or a long continuous duty cycle.