What's inside
As an Amazon Associate I earn from qualifying purchases. This post may contain affiliate links at no extra cost to you.
For most home shops, the Lincoln Electric POWER MIG 210 MP is the best all-round MIG and stick welder; choose the ESAB Rebel EMP 215ic for the strongest portable multi-process package, the Miller Multimatic 215 for refined controls and support, and a budget inverter only when its lower duty cycle and accessory costs are acceptable.
As an Amazon Associate we earn from qualifying purchases at no extra cost to you.


What we cover
MIG and stick welder comparison
A combination machine has to do two different jobs well. MIG welding rewards stable wire feeding, predictable voltage control, and a good gun connection. Stick welding depends more on arc-start behavior, adjustable amperage, electrode compatibility, and the machine’s ability to tolerate long leads. A welder can advertise both processes while being noticeably better at one.
| Model | Input power | Output range | Weight | Duty-cycle reference | Best fit |
|---|---|---|---|---|---|
| Lincoln POWER MIG 210 MP | 120/230 V, single phase | 20–200 A, depending on process | About 40 lb | Up to roughly 25% at high MIG output; higher at moderate settings | General fabrication and repair |
| ESAB Rebel EMP 215ic | 120/230 V, single phase | 5–240 A, depending on process and input | About 41 lb | Approximately 25–40%, depending on input and amperage | Portable, frequent multi-process work |
| Miller Multimatic 215 | 120/240 V, single phase | 30–230 A, depending on process | About 38 lb | Approximately 20% at maximum rated MIG output | Simple setup and serviceability |
| Budget 200–250 A inverter combo | 120/240 V or 220/240 V, varies | 20–200 or 250 A claimed | 18–30 lb | Often 20–60% at a lower tested amperage | Occasional repairs and low purchase cost |
These figures are useful for comparing machine class, but duty-cycle percentages are not interchangeable. Manufacturers may rate a machine at different ambient temperatures, amperages, and input voltages. Always compare the duty cycle at the amperage you actually expect to use.
Our picks by situation
Best overall: Lincoln POWER MIG 210 MP
The Lincoln is the safest choice for a homeowner or small fabrication shop that needs a genuine stick MIG welder rather than a machine built around only one process. Its dual-voltage input works from a normal 120-volt receptacle for lighter jobs and from 230 volts when you need useful output for thicker steel. The interface is approachable, with process selection and guided settings that reduce setup errors for newer welders.
In MIG mode, it is well suited to mild-steel projects using solid wire and shielding gas, including brackets, gates, carts, and automotive sheet metal. Stick mode is practical with common 6011 and 7018 electrodes, although a 230-volt supply makes sustained work much more comfortable. Its main limitation is not capability but heat: at the top of its range, the duty cycle is too short for continuous production welding.
Best portable premium option: ESAB Rebel EMP 215ic
The Rebel is the strongest choice when portability matters but the machine will still see regular use. Its compact design, dual-voltage operation, and broad process capability make it attractive for mobile repair, farm maintenance, and contractors who move between outlets. The display and digital controls provide more setup guidance than a basic knob-controlled inverter.
As a mig stick welder, it performs best when the operator takes advantage of its process presets instead of treating it like a simple transformer machine. It can handle common MIG and stick work, but output and duty cycle still depend heavily on 120- versus 230-volt input. The extra purchase price is easier to justify if you also value its TIG capability and portability; for occasional garage repairs, it may be more machine than necessary.
Best for uncomplicated operation: Miller Multimatic 215
The Miller Multimatic 215 is a strong pick for users who want a polished machine with straightforward controls and a broad service network. It is particularly attractive to a beginner who expects to use MIG most often but wants stick capability for outdoor work, dirty steel, or situations where carrying a gas cylinder is inconvenient.
Its MIG performance is the reason to buy it. The wire-feed system and setup interface are predictable, and the machine transitions easily between common wire sizes and shielding-gas arrangements. Stick mode is useful for repair work, but this is not a high-output production stick machine. If your work consists mainly of long structural welds with 1/8-inch electrodes, a dedicated 240-volt stick welder may deliver more welding time per dollar.
Best low-cost choice: a 200–250 amp dual-voltage inverter
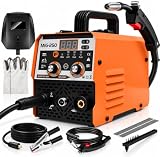
Generic and lesser-known inverter machines can be good value for infrequent welding, especially when the work involves short beads on mild steel. They are often lighter—roughly 18 to 30 pounds—and may cost about $250 to $600, compared with approximately $900 to $1,500 for established premium combo machines.
The trade-off is inconsistency. A budget machine may claim 250 amps but provide that number only briefly, on 240 volts, at a low ambient temperature. Wire-drive quality, torch liners, earth clamps, and replacement boards may also be less dependable. Treat the advertised maximum as an emergency ceiling, not as a practical continuous rating.
MIG versus stick: which process matters more?
Choose MIG or stick welding based on the work environment, not just the thickness printed on a chart.
- Choose MIG for clean mild steel, thin material, repeated joints, and projects where appearance and speed matter. Solid wire with gas produces less slag and usually requires less cleanup.
- Choose stick outdoors, on rusty or painted steel after sensible cleaning, or when you need a simple setup without a gas cylinder. Stick electrodes also tolerate longer cables better than many compact MIG systems.
- Choose both if you repair equipment in different locations, work on material from roughly 16-gauge sheet through 1/4-inch plate, or want one machine for indoor fabrication and outdoor maintenance.
In the common MIG welder vs stick decision, MIG wins on productivity and finish, while stick wins on simplicity and field tolerance. Neither process eliminates the need for clean joint surfaces, correct polarity, proper protection, and safe ventilation.
Decision matrix before buying
| Your situation | Recommended type | What to prioritize | What to avoid |
|---|---|---|---|
| Beginner, occasional projects, 120 V garage | Guided dual-voltage combo | Simple controls, included MIG gun, clear manuals | Machines with impressive amperage but no useful 120 V rating |
| Frequent fabrication in a fixed shop | 240 V combo or dedicated MIG plus stick machine | Duty cycle, spool capacity, replacement parts | Small machines rated only for short intermittent beads |
| Mobile repair or farm work | Portable dual-voltage combo | Weight, 6011 compatibility, long-lead performance | Fragile accessories and a machine requiring gas for every job |
| Lowest initial budget | Budget inverter combo | Real warranty, consumable availability, 240 V output | Unknown duty-cycle test conditions and proprietary consumables |
The accessory cost most listings hide
A welder is rarely ready for useful MIG work straight out of the box. Budget approximately $150 to $400 for the supporting equipment if you are starting from nothing:
- Gas regulator and hose: about $40–$100.
- Small shielding-gas cylinder and initial fill: about $100–$250, varying substantially by region and cylinder ownership.
- Extra contact tips, nozzles, liners, and a spool of wire: about $30–$80.
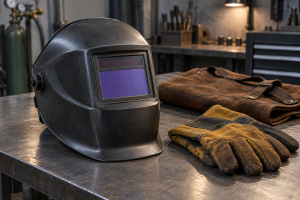
- Auto-darkening helmet, gloves, jacket, and basic cleaning tools: about $100–$300.
- Stick electrode holder and work lead, if not supplied: about $40–$100.
For example, a $350 budget combo can become a $650–$800 working MIG setup once gas, PPE, wire, and consumables are included. If most of your work is outdoors, flux-core wire can reduce gas-cylinder expense, but it creates more smoke and slag and may require a different polarity and knurled drive roll.
Duty cycle and input power in practical terms
A 30% duty cycle over a 10-minute period means roughly three minutes of arc time followed by seven minutes of cooling at the stated test conditions. It does not mean the welder can run for three minutes continuously at every amperage. Lowering amperage, using 230 volts, keeping vents clear, and avoiding unnecessary starts can all increase useful productivity.
Consider a 1/8-inch 7018 electrode. A typical setting may be around 115–135 amps. A dual-voltage combo connected to 230 volts will usually maintain that work more comfortably than on 120 volts, where nuisance breaker trips and thermal shutdowns are more likely. For 1/8-inch steel MIG work, roughly 18–20 volts and about 100–140 amps may be appropriate depending on wire diameter, joint design, and transfer mode. Use the machine’s chart as a starting point, then adjust from bead shape and penetration.
Ownership realities and maintenance
The first parts to wear are usually MIG contact tips, nozzles, liners, drive rolls, and gun trigger components—not the power electronics. Keep the wire dry, remove dust from the wire compartment, inspect the ground clamp regularly, and do not drag the gun by its cable. A clogged liner or incorrect drive-roll tension can look like a weak welder when the real problem is erratic wire feeding.
For stick welding, store electrodes according to the manufacturer’s instructions. Moisture-sensitive 7018 rods can produce poor arc behavior and questionable weld quality when stored carelessly. Clean mill scale and coatings from the joint, especially when using MIG, because contamination causes porosity and makes a capable machine appear unreliable.
Before buying any stick and MIG welder, confirm four things: it accepts the electrode types you intend to use, it includes the leads and gun you need, its 230-volt plug matches your shop circuit, and replacement tips, liners, rolls, and boards are available. The best combo is not the one with the highest number on the front panel; it is the one that supplies the right process, input power, duty cycle, and support for the work you will actually do.