What's inside
- Best Clear Welding Lenses for Better Visibility
- What to look for before buying
- Clear lens formats compared
- Best choices by welding situation
- Head-to-head: universal versus manufacturer-specific lenses
- Installation and maintenance that preserve visibility
- When should a clear welding lens be replaced?
- Final buying recommendation
- Best Clear Welding Lenses for Better Visibility
- What to look for before buying
- Clear lens formats compared
- Best choices by welding situation
- Head-to-head: universal versus manufacturer-specific lenses
- Installation and maintenance that preserve visibility
- When should a clear welding lens be replaced?
- Final buying recommendation
As an Amazon Associate I earn from qualifying purchases. This post may contain affiliate links at no extra cost to you.
What we cover
- Best Clear Welding Lenses for Better Visibility
- What to look for before buying
- Clear lens formats compared
- Best choices by welding situation
- Head-to-head: universal versus manufacturer-specific lenses
- Installation and maintenance that preserve visibility
- When should a clear welding lens be replaced?
- Final buying recommendation
Best Clear Welding Lenses for Better Visibility
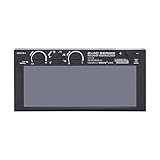
The best clear welding lens is a correctly sized, hard-coated cover plate that fits your helmet without bowing, haze, or optical distortion; it should protect the auto-darkening filter without being mistaken for a welding shade.
A clear lens does not make an arc safe to view by itself. It is normally the outer or inner protection plate used with a properly rated passive or auto-darkening welding filter. Choose the welding shade for the process and amperage first, then choose the clear lens for optical quality, coverage, durability, and helmet compatibility.
As an Amazon Associate we earn from qualifying purchases at no extra cost to you.

What to look for before buying
Optical clarity and distortion
Look through the lens at a straight edge, such as a door frame or ruler. The line should remain straight as you move the lens across your field of view. Wavy lines, rainbow fringes, cloudy patches, or a noticeable change in focus indicate distortion or poor molding. This matters most when positioning a tungsten electrode, following a narrow MIG bead, or inspecting a joint through a large viewing window.
For welding use, look for cover plates marked to the relevant safety standard, such as ANSI Z87.1 in the United States or EN 166 in markets using European standards. A marking is useful only when it belongs to the complete lens product and not merely to its packaging. Do not substitute ordinary clear plastic, acrylic sheet, or household safety glasses for a helmet cover plate.
Lens material and scratch resistance
Polycarbonate is common because it is light and impact resistant. Its weakness is scratching, particularly when the lens is dragged across a steel bench or wiped while covered in grinding dust. A hard-coated polycarbonate cover generally lasts longer than an uncoated one, although no coating makes it scratch-proof.
Glass offers good scratch resistance and a crisp view, but it is heavier and can break if dropped or struck. It is less common as the outer plate on modern auto-darkening helmets. For most fabrication work, a replaceable hard-coated polycarbonate lens is the better ownership choice.
Size and field of view
A larger clear lens can preserve the usable viewing area of a large auto-darkening filter, but only if the helmet’s retaining frame supports it. An oversized plate may bow, leak light around its edges, or press against the filter. A small plate can leave the filter exposed to spatter and grinding debris.
Measure the existing plate rather than relying only on the helmet’s advertised viewing area. Measure width, height, corner shape, thickness, and the position of any locating tabs. A cover plate can have the correct outside dimensions and still fail to seat because its corners or retaining grooves differ.
Clear lens formats compared
| Lens format | Typical dimensions | Typical material | Best use | Main limitation |
|---|---|---|---|---|
| Compact rectangular cover | 90 × 110 mm; 1.0–1.5 mm thick | Hard-coated polycarbonate | Small and mid-size auto-darkening helmets | Less peripheral coverage |
| Large panoramic cover | 100 × 170 mm; 1.0–1.5 mm thick | Hard-coated polycarbonate | Large-view helmets such as many premium panoramic models | More expensive and easier to bend during installation |
| Grinding or face-shield plate | Approximately 100 × 150 mm; 1.5–2.0 mm thick | Impact-rated polycarbonate | Helmet-mounted grinding or face-shield assemblies | Not automatically suitable as an optical welding cover |
| Inner protection plate | Approximately 50 × 100 mm; 1.0–1.5 mm thick | Clear polycarbonate | Protecting the inside of an auto-darkening filter from sweat and dust | Usually not interchangeable with the outer plate |
These are common size ranges, not universal standards. Helmet-specific dimensions take priority. For example, 3M Speedglas 100 and 9100 helmets use different replacement-plate families, while Miller Digital Elite, Lincoln Electric VIKING 3350, and Jackson Safety BH3 helmets each have their own retaining geometry and approved accessories. Confirm the exact helmet series before ordering.
Best choices by welding situation
| Your situation | Best clear-lens choice | Why |
|---|---|---|
| Occasional home MIG welding | Standard-fit, 1.0–1.5 mm hard-coated polycarbonate | Low replacement cost and adequate impact protection |
| Frequent shop work | Manufacturer-approved outer and inner plates kept as spares | Reduces downtime and protects an expensive filter |
| TIG and fine joint work | Lowest-distortion plate with a clean, large viewing area | Improves electrode and puddle visibility |
| Heavy grinding near the helmet | Impact-rated outer cover with a separate grinding shield where required | One plate should not be expected to replace every face-protection system |
| Large panoramic helmet | Exact replacement plate for that helmet model | Prevents gaps, bowing, and interference with the filter |
Head-to-head: universal versus manufacturer-specific lenses
Universal replacement lenses
Universal plates are attractive when the helmet uses a common rectangular opening. They are inexpensive, easy to keep in multiples, and practical for a basic workshop helmet. The trade-off is fit uncertainty. Even a 1 mm dimensional difference can allow dust into the filter or leave the plate under tension.
Manufacturer-specific lenses
Original or model-specific plates usually provide the most predictable fit, especially on helmets with curved windows, side-view lenses, locating tabs, or unusual retaining frames. They cost more per piece, but the additional cost is small compared with replacing a damaged auto-darkening cartridge. This is the safer choice for 3M Speedglas, Miller Digital Elite, Lincoln Electric VIKING 3350, Jackson Safety BH3, and other helmets with proprietary window shapes.
The practical decision is simple: use a universal plate only when its dimensions and retaining details match the old plate exactly. Use the manufacturer’s part family when the helmet has a curved, panoramic, recessed, or unusually shaped viewing window.
Installation and maintenance that preserve visibility
- Remove abrasive contamination first. Blow or brush away metal dust before wiping. Rubbing dry grit across polycarbonate creates fine scratches that scatter light.
- Check both faces. Look for pits, cracks, cloudiness, deep scratches, and heat distortion. Replace the plate if any defect sits in the normal viewing area.
- Seat it without force. The plate should lie flat in its groove. If it bows or the retaining latch requires excessive pressure, the size or thickness is wrong.
- Inspect the seal and frame. Replace a damaged gasket or retaining frame if it allows spatter, dust, or light to reach the auto-darkening filter.
- Clean with mild soap and water. Use a soft microfiber cloth and pat dry. Avoid acetone, brake cleaner, ammonia-heavy glass cleaner, paper towels, and abrasive pads; these can attack coatings or leave micro-scratches.
- Store the spare flat and covered. Keep it in its packaging or a soft pouch rather than loose in a tool drawer with grinding discs and fasteners.
When should a clear welding lens be replaced?
Replace it when scratches force you to squint, haze appears after cleaning, spatter creates opaque dots, cracks reach an edge, or the plate no longer stays securely in its frame. A useful cost calculation is to compare the lens price with its working life: four plates costing $5–$12 each and lasting three months in a busy shop cost about $0.13–$0.27 per working day over 180 days. Delaying replacement to save a few dollars can reduce visibility and expose the much more expensive filter behind it.
Outer plates usually wear first because they receive spatter, grinding dust, and workbench abrasion. Inner plates last longer but should still be inspected for sweat residue, scratches, and distortion. If the auto-darkening filter itself is cracked, permanently dark, slow to react, or visibly damaged, replacing only the clear cover is not enough.
Final buying recommendation
For most users, choose a helmet-specific hard-coated polycarbonate clear welding lens in the original thickness and exact dimensions. Prioritize a flat, undistorted view over the lowest price, and buy an inner plate as well when the helmet’s filter is expensive or the work environment is dusty. A larger lens is worthwhile only when the helmet was designed for it; otherwise, precise fit, clean optics, and timely replacement provide better visibility than extra size.