Our Top Picks
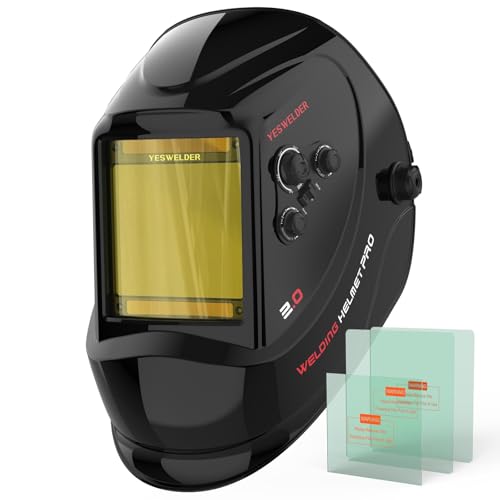
 MIGVAN Welding Helmet Auto Darkening True Color LargeAdjustable9.65 x 7.76 x 11.69 inches2.4 PoundsCheck on Amazon




What's inside
As an Amazon Associate I earn from qualifying purchases. This post may contain affiliate links at no extra cost to you.
Cheap auto-darkening helmets are one of the worst false economies in the trade. The failure mode is not dramatic — it is a slightly slow switch, thousands of times, over years, and eyes that ache at the end of every day.
A helmet is not an accessory. It is the instrument you weld through. Every judgement you make about the puddle — how wide it is, whether the toes are wetting in, whether you are running cold — gets made through that lens. A bad one does not just make you uncomfortable. It makes you work from bad information.
As an Amazon Associate we earn from qualifying purchases at no extra cost to you.




Most people go wrong in one of two directions: they buy on whatever is printed largest on the box, or they buy a good helmet, never touch the sensitivity and delay dials, and spend years fighting a tool set up for somebody else’s job.
What we cover
The four numbers that matter
1. Optical clarity rating (1/1/1/1). Four digits scoring optical class, diffusion of light, luminous transmittance variation and angle dependence. 1/1/1/1 is the best score in each. Anything with a 2 or 3 in it distorts what you see. You notice it as softness toward the edge of the window, or a shade that shifts as you turn your head. Irrelevant on a tack, a real handicap on a long bead you are watching at the edge of your vision. If no rating is stated, assume the worst one.
2. Switching speed. Measured in fractions of a second — 1/25,000s or faster is standard on decent helmets. Slower switching is what causes eye fatigue. Past that threshold the number is a bragging right; you will not feel the difference between 1/25,000s and anything quicker. You will feel a helmet quoting a figure ten times slower, or quoting nothing at all. Lenses also switch slower when cold, which is why a helmet that feels fine in summer can feel gritty in an unheated shop in January.
3. Number of arc sensors. Two is minimum, four is better. Sensors matter most when welding out of position or with the arc partly obscured — a helmet that fails to trigger is the worst possible outcome. Placement counts as much as the count: sensors bunched into one corner of the cartridge all get shadowed by the same hand, flange or fixture. Two is fine on an open bench with a clear line of sight. Four earns its money the moment you are inside a corner or under something.
4. Shade range. 9–13 covers most MIG and stick work. TIG at low amperage needs a helmet that reliably triggers down to very low current — check the minimum amperage rating. That rating, not the shade range, is the real TIG spec: look for a minimum in the low single digits of amps rather than ten or twenty, and treat an unstated minimum as a warning. If you also cut with plasma or oxy-fuel, a helmet with a lower shade band saves you owning a second lens.
Weighing them against each other
They are not equal, and the order changes with the work. Out-of-position and awkward-access welding puts sensors first, because a helmet that occasionally does not fire is a helmet you stop trusting, and then you start peeking. Long beads and TIG put optical clarity first, because you are reading fine detail for minutes at a stretch. High-frequency tacking puts switching speed and an adjustable delay first, because you are cycling the lens hundreds of times an hour. Shade range is the one most people can compromise on, as long as the minimum amperage suits the thinnest metal they weld.
What each price band actually buys
- Bargain bin. No stated switching speed, no optical rating, two sensors, headgear that hurts. These are not cheap versions of good helmets — the filter, the sensors and the harness are exactly what got cut. Suits nobody who welds twice.
- Entry level. A stated optical rating, two to four sensors, basic sensitivity and delay adjustment. Fine for occasional garage MIG and light stick, on a bench, in good light, where the arc is bright and obvious.
- Mid range. Four sensors, 1/1/1/1, a low minimum amperage, true colour optics and headgear you can wear all day. This is where almost everyone should land, hobbyist or working fabricator.
- Premium. A wider clear view, better weight distribution, tougher shells, and spares you can still buy years later. Worth it with serious arc time; not a safety upgrade over a good mid-range helmet.
- Powered air. Filtered air supply, for galvanised, stainless and confined spaces where fume is the bigger hazard. Skip it if your extraction already handles the work you do.
The step you feel most is the first one, out of the unlabelled helmets and into the band where specs are printed and mean something. After that you are buying optics and switching, then comfort and durability.
Three ways to spend, and who each suits
If you want one helmet and no more thinking about it, buy this spec combination and ignore the rest of the box.
Auto-darkening welding helmets
Four sensors, 1/1/1/1 optical clarity, adjustable delay and sensitivity. This spec combination is the practical minimum for regular welding.
Skip it only if you weld twice a year on an open bench — and even then, this is the spec that makes a spare helmet worth owning.
Colour rendering is the one comfort feature that changes how you weld rather than how you feel.
True colour welding helmets
Modern lens coatings reduce the green cast and make the puddle far easier to read. Once you have used one, going back is unpleasant.
Best for TIG, aluminium and anything judged on appearance. Least important if you run heavy stick on structural steel, where the puddle is large, bright and hard to lose.
The helmet covers your face. Most of the exposure left over is skin, and arc burn on the forearms and the back of the neck is the classic beginner’s souvenir.
Welding gloves and jackets
MIG gloves for general work, thin TIG gloves for control, leather or flame-resistant jacket. Cotton is acceptable; synthetics melt to skin.
This one is for everybody. UV bounces off shop walls, clean steel and concrete far more than people expect, which is also why bystanders need screens.
Fit and comfort
A helmet you fight with is a helmet you take off at the wrong moment. Look for a headgear that adjusts in three axes, sits without pressure points, and has a grind mode you can trigger without removing gloves. Weight matters over a full day — every extra ounce is felt in the neck.
Where the weight sits matters as much as how much of it there is. A heavy cartridge hung out front loads your neck every time you nod the shell down. Get the lens close to your face, too: a well-fitted medium window gives you a wider effective field of view than a huge one held out on your forehead.
Two things people discover too late. A helmet that will not clear a respirator is a helmet you take off to breathe. A helmet with no hard hat adapter is a problem the first day you go on site. If you wear glasses, check the clearance, and check whether the cartridge takes a magnifying cheater lens.
Grind mode and features worth having
- ✔ Grind mode toggle reachable with gloves on
- ✔ Adjustable sensitivity for low-amp TIG
- ✔ Adjustable delay for hot metal after the arc stops
- ✔ Replaceable outer cover lenses, cheap and available
- ✔ Solar assist with replaceable battery
Sensitivity and delay are the two dials nobody adjusts and everybody should. Turn sensitivity down if the lens fires on shop lighting, sunlight through the door, or the welder at the next bench. Turn it up if low-amp TIG is letting daylight through mid-bead. Set delay short for tacking so you can see where the next one goes, and long for heavy welding so the lens holds dark while the puddle is still bright enough to hurt. Find those dials with gloves on before you need them.
One warning about grind mode: it switches the auto-darkening off completely. Check it before you strike, every time. Helmets that time out of grind mode on their own are worth the extra.
What to ignore
- ✘ Flame graphics and skull prints — pay for optics instead
- ✘ ”Extra large viewing area” on a helmet with a 3-rated optical class
- ✘ Unbranded helmets with no stated switching speed
- ✘ Fixed-shade helmets, unless you weld one process at one setting forever
Viewing area is the most oversold number on the box — a big window in front of a mediocre filter shows you more of a worse picture. Battery arrangement is undersold: solar assist with a replaceable cell fails gracefully, while a sealed battery turns a good helmet into a disposable one. Look for the actual standard markings on the cartridge, ANSI Z87.1 or EN 379, instead of vague claims of compliance. A helmet that cannot name its standard has told you something.
Mistakes that cost money or eyesight
- Not testing the helmet first. Nod it at the sun or a bright lamp and watch it react before you strike an arc. Do it on a new helmet, after a drop, and on the first cold morning.
- Welding through a chewed cover lens. Pitted plastic scatters light and your brain reads the scatter as a blurry puddle. Change them early, and fit the inner cover lens too — that is what keeps grinding grit off the filter itself.
- Leaving sensitivity maxed out. A lens that darkens at random gets blamed on the helmet when it is really a dial in the wrong place.
- Storing it face up under the bench. Every cut you make sandblasts the lens you are about to look through. Hang it or bag it.
FAQ
Is an expensive helmet really better? Above roughly $150, yes, noticeably — optics and switching improve. Above $400 you are buying comfort and durability more than safety.
Can I use a MIG helmet for TIG? If it triggers reliably at low amperage. Check the specification — many budget helmets do not.
How often do cover lenses need replacing? Constantly. Buy them in packs; a scratched cover lens ruins good optics.
How do I check that a used or older helmet is still worth trusting? Look for standard markings on the cartridge, cracks in the shell or lens, and even darkening across the whole window with no pale patches. Test the trigger on bright light. Anything that fails one of those is a parts donor, not a helmet.
Compare welding helmets →