What's inside
- Quick picks: the easiest welders by situation
- What makes a welder easy to use?
- Head-to-head comparison of beginner-friendly choices
- 1. Best overall easiest welder to use: Hobart Handler 140
- 2. Best for outdoor repairs: Lincoln Electric Handy MIG
- 3. Best step-up machine: Lincoln Electric Power MIG 180C
- 4. Best multiprocess option: Miller Multimatic 215
- Decision matrix: match the welder to your working habits
- Setup that prevents most beginner problems
- Ownership costs and parts that wear first
- Final verdict
- Related Guides
- Quick picks: the easiest welders by situation
- What makes a welder easy to use?
- Head-to-head comparison of beginner-friendly choices
- 1. Best overall easiest welder to use: Hobart Handler 140
- 2. Best for outdoor repairs: Lincoln Electric Handy MIG
- 3. Best step-up machine: Lincoln Electric Power MIG 180C
- 4. Best multiprocess option: Miller Multimatic 215
- Decision matrix: match the welder to your working habits
- Setup that prevents most beginner problems
- Ownership costs and parts that wear first
- Final verdict
- Related Guides
As an Amazon Associate I earn from qualifying purchases. This post may contain affiliate links at no extra cost to you.
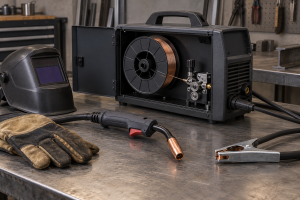
The easiest welder to use for most beginners is a compact 120-volt MIG welder with a simple voltage-and-wire-speed control layout, while a flux-core or multiprocess machine is the better choice when portability or future flexibility matters.
For a first welder, the most important differences are not maximum amperage or marketing claims. Setup time, stable low-amperage performance, clear controls, readily available consumables, and the ability to see and correct mistakes all matter more. The machines below represent the main beginner-friendly choices in 2026.
As an Amazon Associate we earn from qualifying purchases at no extra cost to you.



What we cover
- Quick picks: the easiest welders by situation
- What makes a welder easy to use?
- Head-to-head comparison of beginner-friendly choices
- 1. Best overall easiest welder to use: Hobart Handler 140
- 2. Best for outdoor repairs: Lincoln Electric Handy MIG
- 3. Best step-up machine: Lincoln Electric Power MIG 180C
- 4. Best multiprocess option: Miller Multimatic 215
- Decision matrix: match the welder to your working habits
- Setup that prevents most beginner problems
- Ownership costs and parts that wear first
- Final verdict
- Related Guides
Quick picks: the easiest welders by situation
| Situation | Best machine type | Recommended example | Why it fits |
|---|---|---|---|
| First welder for light repairs | 120-volt MIG | Hobart Handler 140 | Simple controls, familiar setup, good low-current behavior |
| Lowest purchase cost and outdoor work | 120-volt flux-core | Lincoln Electric Handy MIG | No shielding gas required and minimal equipment to start |
| One machine for several processes | Multiprocess MIG/TIG/stick | Miller Multimatic 215 | Easy MIG starting point with room to learn other processes |
| Frequent fabrication on thicker steel | 180-amp MIG or multiprocess | Lincoln Electric Power MIG 180C | More output and duty cycle than basic 120-volt machines |
| Very limited storage or occasional use | Small inverter flux-core/MIG | Compact dual-voltage machine | Light weight and easy to store, though controls vary by model |
What makes a welder easy to use?
An easy welder removes decisions without hiding useful adjustments. For beginners, the best control panel normally has a power switch, a voltage control, and a wire-speed control. Some newer machines add a material-thickness selector or automatic settings. Those presets can shorten setup, but manual voltage and wire-speed controls remain valuable because real joints rarely match a chart perfectly.
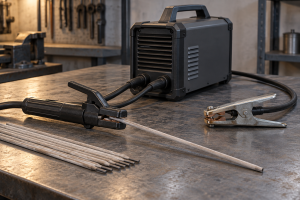
Ease of use also depends on the welding process. MIG welding uses a continuously fed solid wire and shielding gas, producing relatively clean welds that are easy to inspect. Flux-core welding uses a wire containing shielding ingredients, so it works well outdoors but creates smoke and slag. Multiprocess machines offer more capability, but extra cables, polarity changes, and process settings increase the learning curve.
Head-to-head comparison of beginner-friendly choices
| Machine or type | Typical setup time | Controls | Beginner arc behavior | Typical package weight | Learning curve |
|---|---|---|---|---|---|
| Hobart Handler 140 | 10–20 minutes after gas is available | Five-position voltage selector plus wire-speed dial | Predictable on clean mild steel at low and medium settings | About 57 lb | Low |
| Lincoln Electric Handy MIG | 5–15 minutes for flux-core use | Simple voltage and wire-speed controls | Forgiving for basic repairs, with more spatter and slag | About 26 lb | Low to moderate |
| Lincoln Electric Power MIG 180C | 15–25 minutes | Tap voltage controls and continuously adjustable wire speed | Steadier on heavier material than small 120-volt units | About 56 lb | Low |
| Miller Multimatic 215 | 15–30 minutes depending on process | Process selection, voltage, wire speed, and digital guidance | Stable MIG arc, with additional setup for TIG or stick | About 29 lb | Moderate |
| Compact inverter flux-core/MIG machine | 5–15 minutes | Usually two dials or a digital panel | Can be smooth, but quality varies considerably by model | 15–25 lb | Low to moderate |
Weights and included equipment can differ by package and revision, so confirm the current manual before buying. The comparison is intended to show the practical tradeoff: a lighter inverter is easier to move, while a transformer-based machine often has a familiar, uncomplicated control scheme.
1. Best overall easiest welder to use: Hobart Handler 140
The Hobart Handler 140 is a strong first choice for garage projects such as brackets, carts, lawn-equipment repairs, and mild-steel tubing. It runs from a standard 120-volt outlet and uses a straightforward voltage selector with a separate wire-speed adjustment. That simplicity makes it easier to understand than a panel filled with process menus.
Its main advantage is a relatively calm learning path. Start with solid wire and an appropriate shielding-gas mixture, clean the steel, and the arc is usually easier to observe than a flux-core arc. The limitation is output: a 140-amp 120-volt machine is not the right tool for repeated structural work or thick plate. Expect to make multiple passes on heavier sections and follow the machine’s duty-cycle limits.
2. Best for outdoor repairs: Lincoln Electric Handy MIG
A flux-core-capable machine is often the easiest welder to use when gas bottles are impractical. The Lincoln Electric Handy MIG is compact, simple, and can be used with self-shielded flux-core wire for basic mild-steel work. There is no regulator, hose, or gas-cylinder refill to manage.
Flux-core has tradeoffs that a product listing may understate. It produces smoke, spatter, and a layer of slag that must be chipped and brushed away. Wind can still disturb the shielding from the flux, so outdoor welding is not automatically problem-free. The process also makes it harder to see the puddle, increasing the importance of correct travel speed and gun angle.
Choose this style when portability and low initial cost matter more than cosmetic finish. For clean indoor welds on thin material, gas-shielded MIG is usually easier to inspect.
3. Best step-up machine: Lincoln Electric Power MIG 180C
The Power MIG 180C is a sensible choice for someone who expects to weld regularly rather than complete one repair. Its higher output gives more useful range on steel projects, while the controls remain approachable. It is still primarily a MIG machine, so there are fewer process changes to learn than with a multiprocess welder.
A 180-amp class machine also makes electrical planning more important. Depending on the operating voltage and installation, you may need a dedicated 240-volt circuit. A larger machine is not easier if it requires extension cords, adapters, or a circuit that cannot safely support it.
4. Best multiprocess option: Miller Multimatic 215
The Miller Multimatic 215 is a good choice for a beginner who specifically wants one machine for MIG, flux-core, DC TIG, and stick welding. Its guided controls reduce the number of settings needed to begin MIG welding, and its portability is useful for work away from a fixed bench.
It is not the simplest machine in an absolute sense. Each additional process introduces different cables, polarity requirements, electrodes, and techniques. TIG, in particular, requires more careful material preparation and torch control than MIG. Buy a multiprocess machine for the flexibility, not because every process will be equally easy on day one.
Decision matrix: match the welder to your working habits
| Budget and use pattern | Choose | Accept these compromises |
|---|---|---|
| Under roughly $300, fewer than five projects per year | Basic 120-volt flux-core or MIG/flux-core machine | Lower duty cycle, more spatter, limited thick-steel capacity |
| $400–$800, indoor garage repairs | Established 120-volt MIG machine with gas capability | Need a cylinder, regulator, and clean, dry storage |
| Frequent fabrication, 1/8-inch to 1/4-inch steel | 180-amp or larger machine, preferably on 240 volts | Higher purchase cost and less portability |
| Small workspace or mobile repairs | Compact inverter multiprocess machine | More menus, more accessories to organize, variable fan noise |
| Want to learn several processes | Multiprocess MIG/TIG/stick machine | Longer setup and separate learning curves |
Setup that prevents most beginner problems
- Identify the steel thickness. A machine’s maximum thickness is not the same as its comfortable single-pass thickness. For a 1/8-inch mild-steel joint, a 120-volt machine may work well with a suitable bevel or multiple passes.
- Clean to bright metal. Remove paint, rust, oil, and mill scale from both sides of the joint. Contamination causes porosity and makes arc behavior seem worse than it is.
- Match wire size to the work. A common starting point is 0.023-inch solid wire for thinner material and 0.030-inch wire for general-purpose mild steel. Follow the machine and wire manufacturer’s chart.
- Set polarity correctly. Solid MIG wire normally uses electrode-positive polarity, while many self-shielded flux-core wires use electrode-negative polarity. Verify the wire label rather than guessing.
- Practice on scrap of the same thickness. Adjust one control at a time. A cold, narrow bead may need more heat or slower travel; excessive spatter may indicate incorrect settings, poor stickout, contamination, or an unstable hand position.
- Inspect the finished bead. Look for consistent width, good tie-in at both edges, and no visible holes or slag pockets. A shiny bead is not automatically a strong bead.
Ownership costs and parts that wear first
The machine is only part of the budget. A gas MIG setup typically needs a regulator, hose, cylinder rental or purchase, solid wire, contact tips, nozzles, and anti-spatter supplies. Flux-core avoids gas costs but uses wire faster in some repairs and requires replacement tips and nozzle cleaning.
Contact tips usually wear before the welder itself. Replace one when the wire drags, the hole becomes visibly enlarged, or feeding becomes inconsistent. Liners can collect dust and metal debris, especially when the spool is stored uncovered. Keep the wire dry, brush slag from flux-core welds, and use compressed air only as directed by the manual; blowing debris into the machine can move contamination deeper inside.
A useful ownership calculation is cost per small project. Suppose a beginner uses 2 lb of wire on a repair, with wire costing about $8–$15 per spool, and consumes approximately $3–$6 of gas. Add roughly $1–$3 for tips and electricity, and consumables may total about $12–$24 before metal and safety equipment. A flux-core repair may eliminate the gas cost but can consume more wire and require more cleanup. The cheaper process depends on how often and where you weld.
Final verdict
For the easiest first experience, choose a reputable 120-volt MIG welder with clear voltage and wire-speed controls, such as the Hobart Handler 140. Choose a compact flux-core machine when outdoor portability and low setup cost matter most. Choose the Lincoln Power MIG 180C for regular fabrication and a Miller Multimatic 215 when learning multiple welding processes is part of the plan.
Whichever machine you buy, prioritize a stable low-amperage arc, accessible replacement consumables, a proper duty-cycle rating, and controls you can understand without constantly consulting a menu. Those practical details will shorten the learning curve more than a high maximum-amperage number.