What's inside
- Personal protective equipment for welders: the buying checklist
- Choose the helmet by process and visibility
- Helmet comparison by working situation
- Gloves: balance heat protection with control
- Jackets, sleeves, trousers, and the gaps people miss
- Footwear and hearing protection
- Respirators: select them after improving ventilation
- Fit the kit to your budget and experience
- Maintenance that extends PPE life
- Personal protective equipment for welders: the buying checklist
- Choose the helmet by process and visibility
- Helmet comparison by working situation
- Gloves: balance heat protection with control
- Jackets, sleeves, trousers, and the gaps people miss
- Footwear and hearing protection
- Respirators: select them after improving ventilation
- Fit the kit to your budget and experience
- Maintenance that extends PPE life
As an Amazon Associate I earn from qualifying purchases. This post may contain affiliate links at no extra cost to you.
The right personal protective equipment for welders depends on the process, amperage, materials, ventilation, and work position—not simply on buying the darkest helmet and thickest gloves.
What we cover
- Personal protective equipment for welders: the buying checklist
- Choose the helmet by process and visibility
- Helmet comparison by working situation
- Gloves: balance heat protection with control
- Jackets, sleeves, trousers, and the gaps people miss
- Footwear and hearing protection
- Respirators: select them after improving ventilation
- Fit the kit to your budget and experience
- Maintenance that extends PPE life
Personal protective equipment for welders: the buying checklist
Use this checklist before purchasing welder protective equipment:
As an Amazon Associate we earn from qualifying purchases at no extra cost to you.
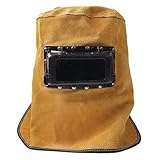


- Helmet: choose an auto-darkening model with the correct shade range, independent shade and sensitivity controls, a clear grinding mode, and a lens that meets ANSI Z87.1 or the applicable local standard.
- Gloves: match dexterity and heat resistance to the process. TIG requires thinner, more tactile gloves than stick or heavy MIG work.
- Jacket and clothing: select flame-resistant leather, cotton, or purpose-made welding fabric without synthetic fibers that can melt.
- Footwear: use leather, lace-free or well-covered safety boots with slip-resistant soles and protection from falling objects.
- Respiratory protection: control fumes at the source first; use a properly selected respirator only when ventilation and process controls do not provide adequate protection.
- Hearing protection: add earplugs or earmuffs for grinding, plasma cutting, gouging, and other high-noise work.
- Fit: check that every item stays in place while bending, reaching, kneeling, and looking through the helmet.
Choose the helmet by process and visibility
A fixed-shade passive helmet is inexpensive and reliable, but it requires lifting or nodding the helmet to inspect the joint. It can work well for occasional stick welding when the shade is correctly selected. For most users, an auto-darkening helmet is more practical because it switches from a light state to a welding shade as the arc starts.
Look for four independent features:
- Shade range: a typical general-purpose helmet covers approximately shade 5 to 13. Lower shades support grinding or some cutting modes; higher shades are useful for brighter, higher-current arcs.
- Viewing area: a larger window makes joint positioning easier, but usually adds weight. A viewing area around 3.9 by 2.4 inches is compact; approximately 4.0 by 2.5 inches or larger is more comfortable for varied work.
- Reaction time: many quality auto-darkening lenses switch in roughly 1/25,000 second or faster. Faster is useful, but correct shade, coverage, and lens condition matter just as much.
- Power system: replaceable batteries are easy to keep operational; solar-assisted models reduce battery use but still need periodic inspection and storage away from extreme heat.
For TIG welding, prioritize low-amperage sensitivity and a stable light state. A helmet that does not reliably detect a small TIG arc may leave the lens light when you expect it to darken. For MIG and stick welding, arc sensors, shade adjustment, and side coverage are usually more important than an oversized viewing window.
Helmet comparison by working situation
| Situation | Useful specification | Reasonable choice | Common compromise |
|---|---|---|---|
| Occasional stick welding | Fixed shade 10–12 or auto shade 9–13; about 1.5–2.0 lb | Basic passive or auto-darkening helmet | Smaller window and fewer adjustments |
| Regular MIG fabrication | Shade 9–13, 2–4 sensors, 3.9 × 2.4 in or larger view | Adjustable auto-darkening helmet | More weight and battery maintenance |
| Low-amperage TIG | Low-current sensitivity, shade 5–13, adjustable delay | TIG-capable auto-darkening helmet | Usually costs more than a basic MIG helmet |
| Frequent grinding and cutting | Dedicated grind mode, impact-rated clear state, side coverage | Helmet with separate grind setting | Grind mode must be deliberately switched back |
Never weld with a cracked cover lens, damaged filter, loose headgear, or lens that flickers. Keep spare outer cover lenses available; they are inexpensive consumables and often wear out before the helmet itself.
Gloves: balance heat protection with control
Heavy stick and high-amperage MIG work generally call for thick leather gauntlet gloves with long cuffs. They protect the hands and forearms from sparks, radiant heat, and sharp edges, but their bulk reduces wire-feeding and torch control.
TIG welding requires a different choice: thin, close-fitting goatskin, deerskin, or similarly flexible welding gloves can improve fingertip control. They should still provide heat and abrasion protection, but they are not intended for grabbing hot steel immediately after welding.
- Choose a cuff long enough to overlap the jacket sleeve.
- Reject gloves with burned-through fingertips, hardened leather, open seams, or oily contamination.
- Do not use wet gloves; moisture can conduct electricity and rapidly transfer heat.
- Keep a second pair for handling hot parts and rough stock so your precision gloves last longer.
Jackets, sleeves, trousers, and the gaps people miss
Leather jackets provide strong spark and heat resistance, while flame-resistant cotton is lighter and more comfortable for lower-spark work. A welding jacket should close at the front, cover the neck and wrists, and overlap trousers and gloves. Avoid polyester, nylon, fleece, and other fabrics that can melt or continue burning when exposed to sparks.
For overhead welding, add a leather cape, sleeves, or bib designed for welding. For bench work, a jacket may be sufficient, but exposed forearms and open collars remain vulnerable to ultraviolet radiation and sparks. Wear full-length trousers over the tops of boots, not tucked inside them, so falling sparks do not collect in the footwear.
Footwear and hearing protection
Choose sturdy leather safety boots with a defined heel or slip-resistant sole, protective toe construction, and adequate ankle coverage. Lace covers or a closed upper reduce the chance of sparks entering the boot. Lightweight fabric shoes and exposed low-cut footwear are poor choices even for short jobs.
Hearing protection is especially important when welding is combined with grinding, chipping, plasma cutting, or air tools. Foam earplugs are convenient and inexpensive; earmuffs are easier to put on correctly and can be worn over plugs when noise is high. Do not rely on a helmet alone for hearing protection.
Respirators: select them after improving ventilation
Welding fumes vary with the base metal, coating, filler, shielding gas, and process. Start with local exhaust positioned close to the plume, clean surfaces before welding, and avoid welding unknown coatings. General shop ventilation is not always enough because it may move the plume through the breathing zone.
Where a respirator is needed, the cartridge or filter must match the hazard. A disposable particulate respirator may not protect against gases or vapors, while an organic-vapor cartridge is not a universal welding-fume solution. Respirators must seal against the face, so facial hair in the sealing area can prevent a reliable fit. Workplace respiratory programs may require medical evaluation, fit testing, training, and a written selection procedure; consult a qualified safety professional for site-specific requirements.
Fit the kit to your budget and experience
| Buyer profile | Prioritize | Acceptable compromise | Do not compromise on |
|---|---|---|---|
| Beginner, occasional work | Auto-darkening helmet, leather gloves, jacket, safety boots | Small-to-medium viewing area | Correct shade, intact lens, full skin coverage |
| Frequent MIG fabrication | Durable helmet, long-cuff gloves, leather sleeves, hearing protection | Heavier helmet if headgear balances well | Ventilation and protection from sparks |
| TIG-focused user | Low-current helmet sensitivity, thin gloves, precise fit | Less heavy leather coverage away from the arc | Reliable arc detection and UV coverage |
| Small shop with grinding | Grind-rated helmet mode, face protection, earmuffs, local extraction | Separate face shield rather than a premium helmet | Impact-rated eye and face protection |
Maintenance that extends PPE life
Wipe the helmet shell and lens covers with a soft, clean cloth; replace scratched covers rather than polishing them aggressively. Inspect the headband for slipping and replace batteries before important work. Hang leather clothing to dry naturally and keep it away from solvents, oil, and direct high heat. Clean gloves according to their care instructions and retire them when heat damage changes the leather’s texture.
Before every job, perform a 60-second check: confirm the helmet shade and mode, inspect the lens, close the jacket, overlap gloves and sleeves, secure trouser cuffs over the boots, check ventilation, and put on hearing protection before starting the grinder. The best personal protective equipment for welders is the equipment that matches the process, fits correctly, and is maintained well enough to be worn every time.