What's inside
- What is in this guide
- How MIG welding works, in plain terms
- The main types of beginner MIG machines
- Power supply and amperage: what your shop can run
- Duty cycle and thickness capacity
- Wire, shielding gas, and consumables
- Features that actually help a beginner
- Matching a machine to your projects
- Safety and setup before the first arc
- Common beginner mistakes
- Who should choose what
- Buying checklist
- Frequently asked questions
- Conclusion
- What is in this guide
- How MIG welding works, in plain terms
- The main types of beginner MIG machines
- Power supply and amperage: what your shop can run
- Duty cycle and thickness capacity
- Wire, shielding gas, and consumables
- Features that actually help a beginner
- Matching a machine to your projects
- Safety and setup before the first arc
- Common beginner mistakes
- Who should choose what
- Buying checklist
- Frequently asked questions
- Conclusion
As an Amazon Associate I earn from qualifying purchases. This post may contain affiliate links at no extra cost to you.
The short answer: the best MIG welder for a beginner is a machine that matches the metal you actually plan to weld, runs on power you already have, and is simple enough that you spend your practice time on technique rather than fighting settings. For most hobbyists who work on thin to medium mild steel in a garage, that means a compact, entry-level MIG-capable machine that runs on a standard household circuit, accepts both gas and flux-cored wire, and has clear, well-labeled controls. If you plan to weld thicker plate or run for long stretches, step up to a larger machine that needs a dedicated circuit.
What we cover
- What is in this guide
- How MIG welding works, in plain terms
- The main types of beginner MIG machines
- Power supply and amperage: what your shop can run
- Duty cycle and thickness capacity
- Wire, shielding gas, and consumables
- Features that actually help a beginner
- Matching a machine to your projects
- Safety and setup before the first arc
- Common beginner mistakes
- Who should choose what
- Buying checklist
- Frequently asked questions
- Conclusion
Our Top Picks
 YESWELDER Auto Darkening Welding Helmet 1/1/1/1 True Color3.64 x 1.67"1 x 1 x 1 Inches1 PoundsCheck on Amazon
What is in this guide
- How MIG welding works, in plain terms
- The main types of beginner MIG machines
- Power supply and amperage: what your shop can run
- Duty cycle and thickness capacity
- Wire, shielding gas, and consumables
- Features that actually help a beginner
- Matching a machine to your projects
- Safety and setup before the first arc
- Common beginner mistakes
- Who should choose what
- Buying checklist
- Frequently asked questions
- Conclusion
How MIG welding works, in plain terms
MIG stands for metal inert gas, and the process is formally called gas metal arc welding. A spool of thin wire is driven through a hand-held gun by a motor in the machine. When you squeeze the trigger, the wire touches the work, completes an electrical circuit, and an arc forms. The arc melts both the wire and a small pool of the base metal, and the two fuse as they cool. Because the wire is fed automatically, you only have one hand job to worry about: moving the gun at a steady speed and angle. That is the reason MIG is so often recommended as a first process.
The arc has to be protected from the air, because oxygen and nitrogen in the atmosphere cause porosity, which looks like tiny pinholes and weakens the weld. Traditional MIG uses a cylinder of shielding gas delivered through a regulator and hose to the gun. A close cousin, flux-cored arc welding, uses a hollow wire with flux inside that creates its own protective cloud as it burns. Many beginner machines can do both, and understanding the difference is the single most important step in choosing one.
The main types of beginner MIG machines
Almost every machine a newcomer will see falls into one of the groups below, and each carries trade-offs in cost, capability, and convenience.
Flux-core-only machines
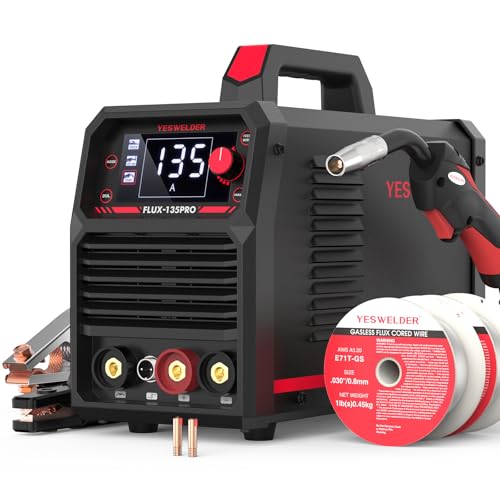
These are the simplest and usually the cheapest. They are built to run self-shielded flux-cored wire, so there is no gas cylinder, regulator, or solenoid to buy. They are popular for repair work, farm and ranch jobs, and welding outdoors. The downside is that flux-cored welds throw more spatter, leave a slag layer you must chip off, and produce more smoke.
Dual-process (gas and flux-core) machines
These machines can run solid wire with shielding gas or flux-cored wire without it, usually by changing the polarity at the machine and swapping a few parts. For a first purchase, this category offers the best flexibility. You can start with flux-cored wire to avoid the cost of a gas setup, then add a cylinder and regulator when you want cleaner results.
Gas-only MIG machines
These are built around solid wire and shielding gas. They produce cleaner welds, little spatter when set correctly, and no slag to chip. They require a cylinder, regulator, and a draft-free workspace.
Multi-process inverter machines add stick or TIG modes for the undecided, but more menus can distract from basics; commit to one process for your first weeks. Older transformer designs are heavy but rugged, while inverters are lighter and finer to adjust but less forgiving of dust and poor power.
| Type | Shielding | Best for | Main strength | Main drawback |
|---|---|---|---|---|
| Flux-core only | Self-shielded wire | Outdoor repair, rough fabrication | Low startup cost, wind tolerant | Spatter, slag, rougher beads |
| Dual-process | Gas or flux-core | General hobby use, learning | Flexible, can grow with you | Needs a polarity change; extra parts for gas |
| Gas-only | Bottled gas | Indoor fabrication, thin steel | Clean, low-spatter welds | Cylinder cost, no wind tolerance |
| Multi-process | Depends on mode | People undecided on process | Several processes in one unit | More menus and cost; steeper setup |
Power supply and amperage: what your shop can run
Before you shop for features, look at your electrical panel and outlets. The power available to the machine sets the ceiling for the thickness you can weld, and ignoring it is one of the most common reasons beginners end up with a machine that frustrates them.
Smaller beginner machines are designed to plug into a standard household outlet. Larger machines need a higher-voltage circuit like the one used for a clothes dryer or electric range. Some machines are dual-voltage and accept either, with a different plug or adapter for each. A dual-voltage unit gives you a path to grow: you can start in a spare room or garage with a regular outlet and later move to a dedicated circuit for heavier work. However, a machine running on the lower voltage will have less output and a lower duty cycle than it does on the higher voltage, so read the specification for each mode instead of assuming they are the same.
Duty cycle and thickness capacity
Two numbers on the spec sheet matter more than any marketing language: maximum thickness and duty cycle. Both should be read conservatively.
Duty cycle is the portion of a ten-minute period during which the machine can weld at a given output without overheating. A rating of, say, twenty percent at a high amperage means about two minutes of welding followed by about eight minutes of rest. Beginners rarely need long continuous runs because they stop often to reposition, check the bead, and chip slag. Even so, a machine with a low duty cycle at the settings you use can shut down on a thermal protection circuit in the middle of a long joint, and that interrupts the weld and creates a cold start. Look at the duty cycle at the amperage you expect to use, not only the headline figure. As a general rule, machines run cooler and last longer when you work well below their maximum.
Wire, shielding gas, and consumables
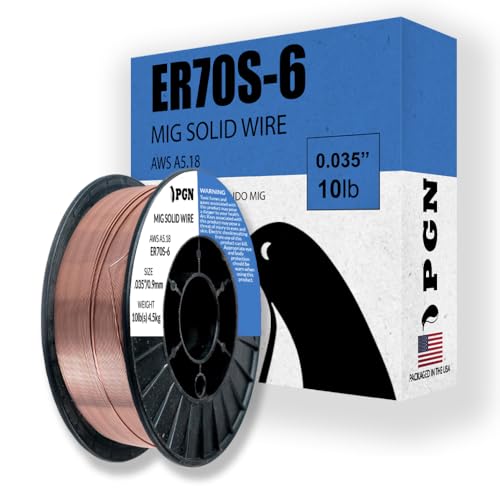
The machine is only half the cost. Solid wire comes in several diameters; thinner wire suits light-gauge material and thicker wire carries more current. The drive roll and contact tip must match the wire diameter, or you will get poor feeding and tangles at the drive rolls. Store wire dry, since surface rust contaminates the weld and clogs the liner.
For mild steel many welders use an argon and carbon dioxide blend. Aluminum needs pure argon and a feed system for soft wire, so do not start there. Ask a local gas supplier about cylinder sizes and refill policy.
Compressed gas cylinders are under very high pressure. Keep them upright and chained to a wall or cart, with the cap on when the regulator is off. Crack the valve briefly before fitting the regulator, open it slowly while standing to the side, keep oil and grease off fittings, and check for leaks with soapy water. Contact tips, nozzles, and liners wear out, so keep spares on hand.
Features that actually help a beginner
Many features sound impressive. These are the ones that tend to matter in daily use.
- Clear voltage and wire speed controls. You need two main adjustments. Look for labeled dials or a simple display, and a chart on the machine or in the manual that suggests starting settings by material thickness. A chart is a starting point, not a final answer, because wire, gas, and technique all shift the ideal setting.
- Smooth, consistent wire feed. A reliable drive system with a tension adjustment and easily swapped drive rolls prevents most frustrating feed problems. Metal drive components generally last better than plastic ones.
- A gun with a comfortable handle and cable length. You will hold it for long periods. A very short cable limits how you can position the work. Check that replacement parts for the gun are easy to find.
- Gas solenoid and regulator compatibility. If you plan to use gas, confirm the machine has the solenoid and the right fittings so you are not forced to find adapters.
Matching a machine to your projects
Start with what you want to build or repair; that narrows the field faster than any model list. Thin sheet and auto body work reward fine low-end control and shielding gas. Furniture favors clean, low-spatter gas-shielded beads. Farm and trailer repair favors higher output and flux-cored wire, and any weld that carries a load or protects people should be done or inspected by someone qualified.
| Project type | Typical material | Suggested machine category | Wire and gas approach | Key priority |
|---|---|---|---|---|
| Garden and home repair | Thin to medium mild steel | Compact dual-process | Flux-core outdoors, solid wire plus gas indoors | Simplicity and portability |
| Auto body and sheet metal | Thin sheet steel | Gas-capable with fine low-end control | Small solid wire with shielding gas | Heat control |
| Furniture and decor | Tube, bar, light plate | Gas-capable machine | Solid wire with shielding gas | Clean, low-spatter beads |
| Trailer and farm repair | Medium to thick steel | Higher-output dual-process or larger unit | Flux-core or heavier solid wire | Output and duty cycle |
| Training for a trade | Varies | Match the school equipment | As taught in the course | Transferable skills |
Safety and setup before the first arc
Welding is safe when you respect its hazards and risky when you do not. Treat the following as minimums, and read the manufacturer’s manual and local regulations for complete requirements.
Personal protective equipment
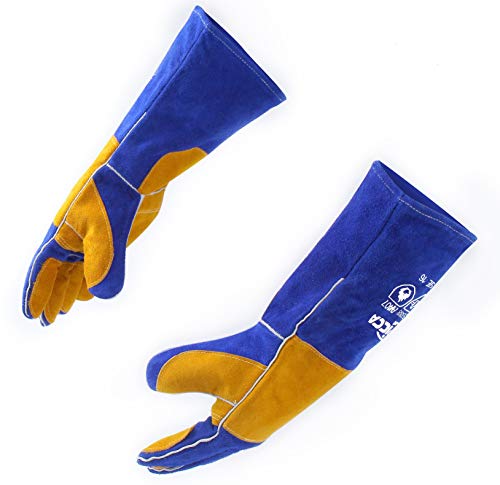
You need an auto-darkening or fixed-shade helmet rated for welding, with a shade appropriate to the process and current. The arc emits ultraviolet and infrared radiation that can burn skin and damage eyes within moments, so cover all exposed skin. Wear dry, insulated welding gloves, a flame-resistant jacket or long sleeves of heavy cotton or wool, and leather boots. Avoid synthetic clothing that melts. Wear safety glasses under the helmet, because grinding and chipping slag throw debris. Bystanders need protection or distance, and no one should look at the arc unprotected.
Ventilation and fumes
Welding produces fumes and gases that you should not breathe. Flux-cored welding in particular generates a lot of smoke. Work in a space with good airflow, use fume extraction when you can, and position yourself so the plume does not rise past your face. Never weld on galvanized, plated, painted, or unknown-coated metal without removing the coating and ensuring strong ventilation, because the fumes can be harmful. Never weld containers that held fuel, solvents, or other chemicals. If you have any doubt about a material, do not weld it. Respiratory protection suitable for welding fumes may be appropriate in some conditions; consult safety guidance for your situation.
Fire prevention
Electrical safety
Inspect cable insulation before use, never weld on a damp floor, and clamp the work lead to clean bare metal. Unplug the machine before opening it.
Workspace setup
Use a stable, non-flammable surface, clean the joint to bright steel, clamp the work so it cannot move, and keep cylinders secured away from the arc.
Common beginner mistakes
- Welding dirty metal. Mill scale, rust, oil, and paint cause porosity and a spitting arc. Grind or wire-brush the joint to bare metal.
- Holding the gun too far away. Excessive stick-out reduces shielding and weakens penetration. Keep a short, consistent wire extension, usually about a quarter to a half inch, and check your manual.
- Moving too fast or too slow. Fast travel leaves a thin, ropey bead with poor fusion; slow travel piles up metal and burns through thin sheet.
Who should choose what
The cautious first-timer should lean toward a compact dual-process machine on a household circuit, start with flux-cored wire, and add gas later. The indoor hobbyist who cares about appearance should plan for gas from the start. The person with heavier plans should accept that a larger machine and a dedicated circuit are part of the cost; a dual-voltage model offers a bridge. The renter must check lease terms, codes, and ventilation first, and a makerspace or class may be a better place to learn. The used-equipment shopper should inspect the gun, cables, drive rolls, and liner, and confirm parts are available.
Buying checklist
- Write down the materials and thicknesses of your first five projects.
- Check which outlet or circuit is available where you will weld.
- Decide whether you will weld indoors, outdoors, or both.
- Choose gas, flux-core, or dual-process based on that environment.
- Read the duty cycle at the amperage you expect to use.
- Confirm the maximum thickness is comfortably above your needs.
- Verify the wire sizes and spool sizes the machine accepts.
- Confirm whether the gas fittings, regulator, and polarity leads are included.
- Look for clear controls and a settings chart.
- Check that spare tips, nozzles, liners, and drive rolls are easy to find.
- Read the warranty terms and the return policy.
- Budget for a quality helmet, gloves, jacket, and fire extinguisher.
- Budget for wire, gas, and consumables, not only the machine.
- Plan a stable work surface and clamps.
- Arrange ventilation or fume extraction.
- Look for local classes or experienced welders who can review your first welds.
Frequently asked questions
Is MIG easier to learn than TIG or stick?
For most people, yes. The machine feeds the wire for you, so you control only travel speed, angle, and distance. TIG requires coordinating a torch, a filler rod, and often a foot pedal, while stick has its own challenges with arc starting and slag. MIG still takes practice, but acceptable results usually come sooner.
Do I need shielding gas as a beginner?
Not necessarily. Flux-cored wire provides its own shielding, so you can start without a cylinder. Gas-shielded MIG gives cleaner results with less spatter, so many people add it later. Choose based on whether you will weld indoors on clean metal or outdoors in drafts.
Can I run a MIG welder on a regular household outlet?
Smaller machines are designed for it, but limits apply. Output and duty cycle are lower than on higher-voltage circuits, and other loads on the same circuit can trip the breaker. Check the machine’s requirements and your circuit rating, and have an electrician add a dedicated outlet if needed.
How thick a metal can a beginner machine weld?
It depends on the specific machine, wire, and technique. Compact household-powered units are generally suited to thin and medium steel, while thick plate calls for more output, joint preparation, and multiple passes.
What is duty cycle and why does it matter?
Duty cycle is the share of a ten-minute window that the machine can weld at a given output without overheating. It matters most for long continuous welds and for high-amperage work.
Can I weld aluminum with a beginner MIG machine?
Aluminum needs pure argon, suitable wire, and a feed system that handles soft wire without tangling, such as a spool gun on some machines. Many entry-level machines are not set up for this.
Is it safe to weld in my garage?
It can be, with precautions. Clear flammable items, provide ventilation, keep an extinguisher nearby, and wear proper protection. Never weld near fuel or on containers that held flammable materials.
Should I buy a used welder to save money?
It can work if you inspect it carefully. Check the gun, cables, drive rolls, and liner, see it run, and confirm that parts are available.
Conclusion
The best MIG welder for a beginner is not defined by a single name but by fit. Start with your projects, your power supply, and your workspace. Choose a machine type that matches them, check duty cycle and thickness limits with a skeptical eye, and budget for protective gear, wire, gas, and consumables. Respect fumes, fire, electricity, and gas cylinders every time. With a sensible machine and steady practice, you will be producing sound beads sooner than you expect.
If you want to start comparing equipment, these categories are useful places to look: entry-level MIG welders, auto-darkening welding helmets, MIG welding gloves, and MIG welding wire and contact tips.
Disclosure: As an Amazon Associate, we earn from qualifying purchases. This means we may receive a small commission if you buy through links on this page, at no extra cost to you.
