
What's inside
As an Amazon Associate I earn from qualifying purchases. This post may contain affiliate links at no extra cost to you.
What we cover
Our Top Picks
 ARCCAPTAIN 200A MIG Welder 110V 220V 6 in20.9" x 8.5" x 16.1"3.5 x 2.4 x 2.8 inches0.9 poundsCheck on Amazon
 YESWELDER Auto Darkening Welding Helmet 1/1/1/1 True Color3.64 x 1.67"1 x 1 x 1 Inches1 PoundsCheck on Amazon



What trailer-frame welding demands
Building a utility trailer from steel channel is a different job from patching thin sheet metal. Channel rails and crossmembers commonly land in the 3/16- to 1/4-inch thickness range, while brackets, fenders and light-gauge decking can be much thinner. A welder must make reliable structural joints on the heavier parts without making burn-through and distortion likely on the lighter ones.
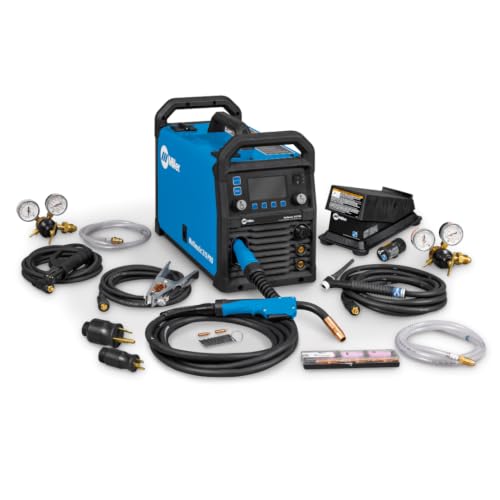
For most home builders, a 180- to 210-amp, 240-volt MIG welder is the practical target. It offers useful capacity for trailer work, provided the machine’s duty cycle and input power suit your shop. A 120-volt machine can handle lighter trailers and occasional welding, but expect slower work and less headroom on thick joints. No machine rating compensates for poor fit-up, inadequate penetration or a bad welding procedure.
As an Amazon Associate we earn from qualifying purchases at no extra cost to you.



Choose the power source for your shop
Start with the outlet, not the biggest amperage printed on the case. A 240-volt circuit gives most mid-size machines more room to weld at higher output without drawing as much current from the supply. Check the welder’s manual for its required breaker, plug and input current; do not assume an existing dryer or range circuit is suitable. Have an electrician assess the installation if needed.
A 120-volt MIG is a reasonable budget choice for occasional light-duty work, especially if the trailer is built from thinner stock and the joints can be welded within the machine’s actual capacity. Its limits show up when you need sustained output on 1/4-inch material or have several long structural seams. A 240-volt machine costs more and may require electrical work, but it is the better fit for repeated frame welding.
Compare rated output and duty cycle, not just “maximum amps.” Duty cycle is the portion of a 10-minute period the welder can operate at a stated setting without overheating. For example, a 30% duty cycle means three minutes of welding followed by seven minutes of cooling at that rating. You can work around a modest duty cycle by tacking, measuring and letting the machine cool, but it slows production.
Welder types for a channel trailer
| Welder type | Where it fits | Main trade-off |
|---|---|---|
| 120-volt MIG | Light trailers, thin parts and occasional repairs | Limited output and slower work on heavy joints |
| 180- to 210-amp, 240-volt MIG | Most home-built utility trailers and mixed-thickness fabrication | Needs a suitable 240-volt circuit; check duty cycle |
| Multi-process inverter | Shops that also need stick or TIG capability | May cost more; make sure its MIG output suits the frame thickness |
| Gasless flux-core machine | Outdoor work where shielding gas is impractical | More spatter, slag to remove and a rougher finish |
For a general-purpose shop machine, compare 180-amp 240-volt MIG welders with 200- to 210-amp options. Read the manual for the wire sizes and material thicknesses the machine supports. A useful machine should have a stable low setting for thin parts as well as enough output for the channel you plan to weld.
Wire, gas and setup
For clean steel in a sheltered shop, solid wire with a shielding-gas mix is usually the easiest route to controlled, clean welds. A common starting setup is 0.030-inch ER70S-6 wire with an argon/CO₂ mix; 0.035-inch wire can suit heavier work if the machine’s drive rolls, liner and settings support it. Use the wire manufacturer’s chart as a starting point, then test on scrap of the same thickness before welding the frame.
Gas-shielded MIG is sensitive to wind. A breeze can disrupt shielding and leave porous, weak welds, so work indoors or shelter the joint. For outdoor welding, self-shielded flux-core is more tolerant of drafts. It produces more smoke and spatter, and its slag must be chipped and brushed off between passes. Check whether the welder accepts the flux-core wire size and whether the polarity must be changed.
Buy a regulator, gas cylinder and correct drive rolls if they are not included. A small cylinder is cheaper to start with but needs more frequent refills. A dependable helmet, gloves and flame-resistant clothing are not optional; use eye and hearing protection when grinding, and keep a suitable fire extinguisher nearby. Search for an auto-darkening welding helmet with a clearly stated safety standard and replaceable cover lenses.
Fit-up matters more than a bigger welder
Remove paint, oil, rust and mill scale around each weld. Aim for tight, consistent joints and use clamps or a fixture to hold the frame square. Tack the assembly at multiple points, recheck diagonals and alignment, then weld in a balanced sequence. Long, continuous welds on one side can pull a trailer frame out of square. Shorter alternating runs help control heat and distortion, but do not substitute for the joint design and weld size required by the trailer plans.
Be especially careful where channel, tongue, coupler and axle brackets meet. These are load-bearing areas, and a pretty bead is not proof of a sound joint. Lack of fusion, undercut, porosity, cracks or a weld that sits on top of contaminated steel are warning signs. If the parts are thick, fit-up is poor or the weld needs multiple passes, use a procedure appropriate to the material and joint. Do not compensate for an undersized machine by repeatedly laying beads over a cold, poorly fused joint.
What to check before buying
Confirm the machine’s input voltage, required circuit, output range, duty cycle and included accessories. Check whether it has a Euro-style torch or a proprietary connection, whether replacement tips and liners are easy to find, and whether the drive system feeds the wire consistently. A two-roll drive can work for ordinary solid wire; a sturdier drive may help with longer leads or more demanding wire setups.
If this is your first welder and your trailer uses common mild-steel channel, a capable 240-volt MIG is the balanced choice. A cheaper 120-volt unit is fine for light work if you accept slower progress and verify its limits. If the shop must also weld outdoors, consider a machine that supports flux-core, or keep a flux-core-capable MIG welder as an option. Choose for the material, power supply and work pace you actually have—not a headline amperage you may never reach.
Related guides
More from Amazon
Programs that pair well with the guide above. Offers and eligibility are set by Amazon and may change.
A free business account with business pricing and bulk-buying tools for work, shop or home office.
Create a business accountFree shipping on eligible items, Prime Video and more. Eligible new members can start with a free trial.
Start a Prime free trialAudiobooks and podcasts to listen to on the go. Eligible new members can start with a free trial.
Try Audible freeAd-free music streaming. Eligible new subscribers can start with a free trial.
Try Music Unlimited freeAs an Amazon Associate we earn from qualifying purchases.










Write Your Review
No reviews yet. Be the first to share your experience!