What's inside
- The Short Answer
- Contents
- What a Multi Process Welder Actually Is
- Types of Multi Process Machines
- How a Beginner Should Choose
- Key Features Explained
- Power, Amperage and Duty Cycle Explained
- What Each Process Is Good At
- First Setup and Practice Plan
- Safety for New Welders
- Care and Maintenance
- Common Beginner Mistakes
- Who Should Choose What
- Beginner Checklist
- Frequently Asked Questions
- Conclusion
- The Short Answer
- Contents
- What a Multi Process Welder Actually Is
- Types of Multi Process Machines
- How a Beginner Should Choose
- Key Features Explained
- Power, Amperage and Duty Cycle Explained
- What Each Process Is Good At
- First Setup and Practice Plan
- Safety for New Welders
- Care and Maintenance
- Common Beginner Mistakes
- Who Should Choose What
- Beginner Checklist
- Frequently Asked Questions
- Conclusion
As an Amazon Associate I earn from qualifying purchases. This post may contain affiliate links at no extra cost to you.
What we cover
- The Short Answer
- Contents
- What a Multi Process Welder Actually Is
- Types of Multi Process Machines
- How a Beginner Should Choose
- Key Features Explained
- Power, Amperage and Duty Cycle Explained
- What Each Process Is Good At
- First Setup and Practice Plan
- Safety for New Welders
- Care and Maintenance
- Common Beginner Mistakes
- Who Should Choose What
- Beginner Checklist
- Frequently Asked Questions
- Conclusion
Our Top Picks
 YESWELDER Auto Darkening Welding Helmet 1/1/1/1 True Color3.64 x 1.67"1 x 1 x 1 Inches1 PoundsCheck on Amazon

The Short Answer
The best multi process welder for a beginner is a dual-voltage inverter machine that offers MIG (with flux-cored capability) and stick, plus a lift-start TIG mode if you want to grow into it, with clear controls and a duty cycle that matches your projects. Beginners do not need the highest amperage. They need a machine that runs on the power they actually have, is forgiving to set up, and comes with a decent manual and the right consumables. Treat the extra processes as a way to learn gradually rather than a reason to buy the biggest unit.
Contents
- What a Multi Process Welder Actually Is
- Types of Multi Process Machines
- How a Beginner Should Choose
- Key Features Explained
- Power, Amperage and Duty Cycle Explained
- What Each Process Is Good At
- First Setup and Practice Plan
- Safety for New Welders
- Care and Maintenance
- Common Beginner Mistakes
- Who Should Choose What
- Beginner Checklist
- Frequently Asked Questions
- Conclusion
What a Multi Process Welder Actually Is
A multi process welder is a single power source that can run more than one welding method. Typical combinations include MIG, flux-cored wire welding, stick (shielded metal arc) and TIG. Instead of buying three machines, you buy one and switch modes with a selector and the right accessories: a wire-fed gun for MIG, an electrode holder for stick, and a torch for TIG.
The appeal for beginners is flexibility. You can start with flux-cored wire, which needs no gas bottle, use stick for rusty or outdoor work and explore TIG when you are ready. The tradeoff is that a combined machine may offer fewer advanced controls in each mode than a dedicated one, and a single failure takes all your processes offline. For learning and home projects, that compromise is usually acceptable.
Types of Multi Process Machines
MIG, flux-cored and stick combinations
This is the most beginner-friendly category. MIG with gas gives clean results on clean steel, flux-cored wire lets you weld outdoors without a cylinder, and stick handles thick or dirty material. TIG may not be included, which keeps the controls simple.
MIG, TIG and stick machines
These add TIG, often in a basic form where you touch the tungsten to start the arc. They invite experimentation with thin material and nicer-looking beads. Some include a foot pedal option or a hand control, but check whether it is actually supplied or sold separately.
Synergic or guided machines
These suggest settings once you pick wire type, wire size and material thickness. For a beginner this removes much of the guesswork about voltage and wire speed, though you still need to understand the principles behind the settings.
Manual-dial machines
These give you direct knobs for voltage and wire speed. They are simple, reliable and educational, but you will need a settings chart and some patience to dial in good welds.
Comparison of machine types
| Machine type | Processes | Learning curve | Best for |
|---|---|---|---|
| MIG, flux-core and stick | Wire-fed plus stick | Gentle | Garage repairs, general fabrication |
| MIG, TIG and stick | All three | Moderate; TIG is demanding | Learners who want to explore thin metal |
| Synergic guided | Varies, with suggested settings | Gentle | Beginners who want a starting point |
| Manual dial | Varies, direct knobs | Moderate | Learners who prefer control and simplicity |
How a Beginner Should Choose
Start with the power you have
Look at your workshop’s outlets and breakers before browsing. A dual-voltage machine can run from a common household supply for lighter work and from a higher-capacity outlet for heavier work, but output is limited by the circuit. If you cannot add a higher-capacity circuit, plan on the lower range and choose accordingly.
Match the machine to the metal
Think about what you will weld most: thin sheet, tubing, angle iron or thicker plate. A small machine handles thin and moderate steel nicely but struggles with thick sections in one pass. If you want to weld aluminum later, check whether the machine can do it, since it typically needs a spool gun or a suitable TIG setup with AC output.
Value clarity over complexity
A clean display, labeled controls and a readable manual are worth more to a beginner than a dozen unused modes. Ask whether settings charts are printed inside the machine or in the manual and whether replacement consumables are easy to find.
Check what is in the box
Some packages include the gun, ground clamp, electrode holder, regulator and hose, and a few consumables; others sell these separately. Build a total cost estimate including a helmet, gloves, jacket, wire, gas and an extinguisher, since the welder itself is only part of the budget.
Key Features Explained
Inverter technology
Inverter machines are lighter and more energy efficient than older transformer designs and often give a smoother arc. That makes them attractive for beginners who need to carry the machine around or work from limited power.
Wire feed system
The drive rolls and spool hub determine how reliably wire feeds. Look for a drive system that accepts the wire sizes you plan to use and offers easy tension adjustment. A feeder that slips or tangles leads to frustrating welds.
Polarity switching
Flux-cored wire and solid wire run on opposite polarities. A machine should make that change straightforward, ideally with clearly labeled leads and a diagram printed on the inside panel.
Arc controls
Features such as hot start and arc force in stick mode help beginners start the arc without sticking and keep the arc stable. Inductance or similar controls in MIG mode shape how fluid or crisp the weld feels.
Protection and cooling
Thermal overload protection shuts the machine down if it gets too hot, which protects the electronics. A fan that runs on demand reduces dust ingestion, but you still need to keep the vents clear.
Power, Amperage and Duty Cycle Explained
Amperage and thickness
Amperage controls heat. More amps allow a weld to penetrate thicker steel, while too many amps on thin steel burns through. A machine’s maximum output only matters if your supply can sustain it. As a broad rule, lower output suits sheet and light tubing, and higher output is needed for thick plate or multi-pass joints.
Voltage and circuits
Many multi process welders accept two supply voltages. On the lower supply the available output is reduced, and on the higher supply it increases. Breakers, wiring and plugs must match the machine’s rated input current. Do not swap in a bigger breaker to stop nuisance trips; that defeats the protection the wiring depends on.
Duty cycle
Duty cycle is the portion of a ten-minute period a welder can deliver a given output before it needs to cool. A rating of, say, a modest percentage at a high setting means a short stretch of welding followed by a longer rest. At lower settings the duty cycle is usually much better. Beginners rarely run at maximum output for long, because short tack welds and practice beads leave plenty of cooling time, so a very high duty cycle is a lower priority than reliable low-end performance and good arc starting.
Gas and wire
MIG with solid wire uses a shielding gas, while self-shielded flux-cored wire does not. Stick electrodes carry their own shielding in the coating. TIG on steel uses an inert gas and a tungsten electrode. Choose wire and electrode types that match both the metal and the machine’s polarity settings.
What Each Process Is Good At
- MIG with gas: Clean, fast welding on clean mild steel, good for auto body, brackets and furniture.
- Flux-cored: Convenient outdoors and on slightly dirty material, producing more spatter and slag to clean.
- Stick: Tolerant of rust, wind and thick material, a favorite for repair and structural work.
- TIG: Precise, tidy welds on thin steel, stainless and sometimes aluminum, but slow and demanding.
Process comparison
| Process | Needs gas? | Cleanliness required | Skill level for first results |
|---|---|---|---|
| MIG with solid wire | Yes | High | Low to moderate |
| Flux-cored wire | Usually no | Moderate | Low to moderate |
| Stick | No | Low | Moderate |
| TIG | Yes | Very high | High |
First Setup and Practice Plan
Setting up the machine
- Read the manual from start to finish, especially the input power and polarity sections.
- Place the welder on a stable surface in a dry, ventilated area with clear space around its vents.
- Connect to an outlet that matches the machine’s rated input, with no extension cord unless it is correctly rated and as short as possible.
- Choose the process, set polarity as shown on the panel diagram and install the correct wire, electrode or tungsten.
- For gas welding, secure the cylinder, fit the regulator and set the flow according to the manual.
- Attach the ground clamp to clean bare metal, as close to the weld as practical.
A sensible learning order
Start with flux-cored or stick on scrap mild steel, practicing straight beads and watching how travel speed and angle change the result. Move to gas MIG once your hand is steady, and try joints such as lap, T and butt on thin plate. Add TIG only after you are comfortable with the others, because it demands both hands and a foot at once. Cut and inspect practice welds to see whether they fused properly, rather than judging by appearance alone.
Safety for New Welders
Eye and skin protection
Use an auto-darkening helmet or a fixed-shade lens rated for the process, wear safety glasses underneath, and cover all skin. Arc light burns skin and eyes quickly, and people nearby need screens or eye protection too. Wear leather gloves, a flame-resistant jacket and cotton or wool clothing without synthetic blends.
Fumes and ventilation
Welding fumes contain metal particles and gases. Work with ventilation that draws fumes away from your face, and use fume extraction or a suitable respirator when working on coated, plated or unknown metals. Galvanized steel in particular should be ground clean before welding, and welding in enclosed spaces needs extra precautions.
Electrical safety
Never weld in wet conditions or with damp gloves. Check cable insulation, make sure the ground clamp bites onto clean metal and plug into a grounded outlet. Do not open the case while the machine is plugged in. If you work away from the main supply, a generator and any extension cord must be rated for the welder’s input demand and used per the manual.
Fire and gas safety
Clear combustibles from the work area, keep an extinguisher close and check the area for smoldering after finishing. Secure shielding gas cylinders upright with a chain or strap and keep the valve cap on when moving them.
Care and Maintenance
Blow dust out of the case periodically with dry, low-pressure air with the machine unplugged. Replace worn contact tips, nozzles and liners, check drive rolls for wear and keep the wire path clean. Store electrodes dry, coil cables loosely and keep the machine covered and off damp floors. Inspect the ground clamp, power cord and gun cable for damage before each session.
Common Beginner Mistakes
- Buying for maximum amperage. Most beginners never use the top of the range, and a simpler machine with good low-end control teaches faster.
- Ignoring the power supply. A machine that trips breakers on a weak circuit is frustrating and can be unsafe.
- Welding on dirty metal. Rust, paint and oil cause porosity, especially with gas MIG and TIG.
- Wrong polarity. Running flux-cored wire on the wrong polarity produces a poor, spattery arc.
- Judging welds by looks. A neat bead can still lack fusion; test practice pieces by bending or cutting them.
- Skimping on protective gear. A helmet, gloves and jacket are as essential as the machine.
Who Should Choose What
Absolute beginners on a budget
A simple MIG, flux-cored and stick machine with a clear panel gets you welding quickly. Browse a few multi process welders suited to beginners and compare included accessories.
Curious learners who want TIG eventually
Choose a MIG, TIG and stick unit but be realistic: TIG takes practice, and a basic TIG mode may need a pedal or better torch later. Good auto-darkening welding helmets help you see what you are doing as you learn.
Home mechanics and repairers
Stick and flux-cored capability matters most for rusty parts and outdoor repairs. Prioritize dual voltage and solid arc starting.
Small-space and mobile users
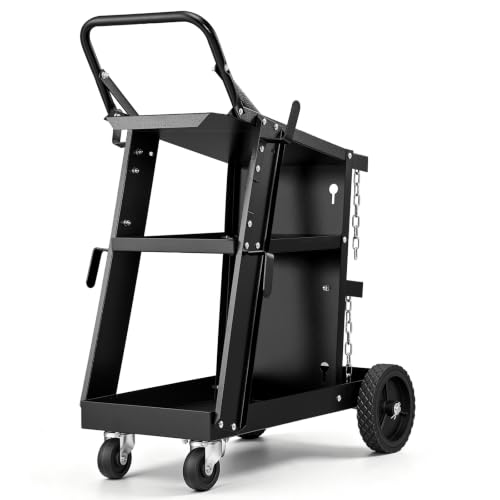
Lightweight inverter units are easier to carry and store, and a compact welding cart keeps the cylinder and cables tidy.
Beginner Checklist
- Check your outlets and breakers and note the supply you can actually use.
- List the metals and thicknesses you will weld in the first year.
- Confirm the machine supports the processes you want and shows polarity clearly.
- Look for hot start, arc force and thermal protection.
- Verify what is in the box and budget for missing consumables.
- Buy a proper helmet, gloves, jacket and boots before the first arc.
- Plan ventilation, a fire extinguisher and a secured gas cylinder.
- Read the manual and settings chart before your first weld.
Frequently Asked Questions
Is a multi process welder good for a first welder?
Yes, if you value flexibility. It lets you learn several methods on one machine, though a simpler single-process unit can be easier to master.
Which process should I learn first?
Flux-cored wire or stick are forgiving and need little prep. Gas MIG is a good next step, and TIG is best left until later.
Can I weld aluminum with a multi process welder?
Only some machines can, usually with a spool gun for MIG or AC capable TIG. Check the manual before assuming support.
Do I need a gas cylinder?
Not for flux-cored wire or stick. Gas is needed for solid-wire MIG and for TIG.
What does dual voltage mean?
The machine can run from two supply levels. Output is lower on the smaller supply, so check what each setting delivers.
Is a high duty cycle important?
Less than you might think for learning, since short welds leave time to cool. It matters more for long production runs.
Can I use a generator?
Often yes, but the generator must meet the welder’s input requirements and the manual’s guidance. Undersized or poor-quality power can damage electronics.
How long does it take to learn to weld?
Basic beads come within hours of practice, but sound, consistent welds take weeks of regular work. Consider a local class for feedback.
Conclusion
The best multi process welder for a beginner is a dependable, dual-voltage inverter machine with clear controls, the processes you will really use, and enough output for your typical projects. Start with forgiving processes, learn to read your welds, and invest in safety gear before the first arc. When you are ready to compare options, review beginner multi process welders against the checklist and pick the one that fits your power supply and your plans.
Disclosure: As an Amazon Associate, we earn from qualifying purchases. Links marked as sponsored may earn a commission at no extra cost to you.
