What's inside
As an Amazon Associate I earn from qualifying purchases. This post may contain affiliate links at no extra cost to you.
The best Miller welder 110V for most home users is the Millermatic 211 PRO if you want MIG flexibility, while the Millermatic 142 is the better compact choice for light fabrication and the Multimatic 220 AC/DC is the strongest option when TIG and stick matter.
“110V” Miller welders are usually designed for a nominal 120V supply. The outlet voltage is not the only issue: a 15A household circuit may limit output, and several higher-output Miller machines work properly only with a dedicated 20A or 30A circuit. Check the welder’s nameplate, plug, manual, and local electrical requirements before installation.
As an Amazon Associate we earn from qualifying purchases at no extra cost to you.


What we cover
Quick comparison of Miller 110V-capable welders
| Model | Processes | 120V output range | Typical 120V duty cycle | Approx. weight | Recommended use |
|---|---|---|---|---|---|
| Millermatic 142 | MIG, flux-cored | 30–140A | 20% at about 90A | About 51 lb | Light repair, sheet metal, small projects |
| Millermatic 211 PRO | MIG, flux-cored | 30–160A on 120V | 20% at about 100A | About 41 lb | General garage work and mixed material thicknesses |
| Multimatic 215 | MIG, flux-cored, DC TIG, DC stick | 20–125A on 120V | Approximately 20% at 100A | About 38 lb | One machine for occasional multi-process work |
| Multimatic 220 AC/DC | MIG, flux-cored, AC/DC TIG, DC stick | Up to about 125A on 120V | Lower on 120V than on 240V | About 56 lb | Aluminum TIG, serious hobby work, broad process coverage |
Specifications can vary by production revision, input configuration, and welding process. Treat the figures above as buying guidance rather than a substitute for the current Miller manual. The practical comparison is more important: the Millermatic models specialize in wire welding, whereas the Multimatic models trade some 120V output and simplicity for process versatility.
Which Miller 110V welder fits your situation?
| Your situation | Best match | Why |
|---|---|---|
| Lowest cost and mostly thin steel | Millermatic 142 | Simple MIG setup and enough capacity for sheet metal, brackets, carts, and small repairs |
| One garage MIG machine for regular projects | Millermatic 211 PRO | More useful output, compact size, and better headroom for heavier mild steel |
| You need MIG plus occasional stick or TIG | Multimatic 215 | More processes without carrying separate machines |
| You specifically want aluminum TIG | Multimatic 220 AC/DC | AC TIG is required for practical aluminum TIG work; most basic 110V MIG machines cannot provide it |
| You weld for long uninterrupted periods | Use 240V when possible | These machines deliver more output and recover less often on 240V than on a household circuit |
Head-to-head: the main choices
Millermatic 142: best for light-duty home welding
The Millermatic 142 is a conventional 120V MIG and flux-cored welder aimed at manageable materials rather than thick structural work. It is a sensible miller 110v welder for someone repairing garden equipment, making light frames, or learning MIG without needing TIG controls.
With solid wire and shielding gas, expect practical single-pass work around 1/8 inch steel and carefully prepared work approaching 3/16 inch with multiple passes. It is better suited to thin tubing and sheet than to repeated welding on 1/4-inch plate. Its roughly 51-pound package is movable, but it is not as easy to carry as the newer 211-style inverter machines.
Millermatic 211 PRO: best overall MIG choice
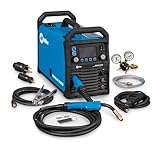
The Millermatic 211 PRO is the strongest all-around 110v Miller welder for many garages. It accepts 120V or 240V input, so it can start on a suitable household circuit and later take advantage of a 240V outlet. That makes it more useful than a machine locked permanently to one voltage.
On 120V, its realistic sweet spot is mild steel from thin sheet through about 3/16 inch, depending on joint design, wire size, preheating, and the number of passes. It can weld thicker material by beveling the joint and making multiple passes, but a 240V supply is preferable for consistent penetration on 1/4-inch work.
The 211 PRO is also a strong portability pick. Its approximately 41-pound weight is manageable for one person, and its inverter design generally gives it a smaller footprint than older transformer machines. Budget for a gas cylinder, regulator, wire, contact tips, nozzles, and a cart if the machine will stay in a garage.
Multimatic 215: best when process flexibility matters
The Multimatic 215 adds DC TIG and DC stick to MIG and flux-cored welding. That is useful when a homeowner wants to weld outdoors with stick, make cleaner stainless-steel work with TIG, or use one power source for varied repairs.
Its compromise is output on 120V. Although its overall rating reaches higher on 240V, household input limits the available welding current. On 120V, treat it primarily as a thin-to-medium-gauge steel machine: approximately 1/8 inch is comfortable, while 3/16 inch may require joint preparation and multiple passes.
DC TIG is not the same as AC/DC TIG. The Multimatic 215 is not the choice for serious aluminum TIG, because aluminum normally requires AC to clean the oxide layer while welding.
Multimatic 220 AC/DC: widest capability, highest complexity
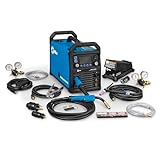
The Multimatic 220 AC/DC is the premium choice when aluminum TIG, stainless work, and stick welding are meaningful requirements rather than occasional curiosities. It provides AC and DC TIG as well as MIG, flux-cored, and stick processes.
It can operate from 120V, but the most demanding work benefits from 240V. On a standard outlet, expect useful aluminum and steel TIG work in thinner sections, with slower progress and more frequent duty-cycle pauses than on 240V. Its controls and accessories also make it more expensive and less beginner-friendly than a dedicated MIG machine.
Breaker and outlet requirements
A standard outlet does not automatically mean a standard 15A circuit is adequate. The Millermatic 142 and similar 120V machines may approach the practical limit of a 20A circuit at high output. The Millermatic 211 PRO and multi-process machines can require substantially more input current at maximum 120V output, sometimes calling for a dedicated higher-rated circuit or a manufacturer-approved plug and breaker arrangement.
- Use a dedicated circuit whenever possible; do not share it with a compressor, heater, or refrigerator.
- Do not use an undersized extension cord. A short 12-gauge cord is a common minimum starting point, but follow the manual for length and amperage.
- Voltage drop can cause poor arc starts, nuisance breaker trips, and reduced output.
- Never replace a breaker with a larger one unless the wiring and receptacle are rated for it and a qualified electrician approves the circuit.
- For repeated high-output work, install a proper 240V circuit rather than forcing a 120V setup to do the job.
How thick can a 110V Miller welder weld?
Thickness depends on amperage, process, joint fit-up, wire diameter, shielding, and whether the weld must be structural. A useful planning estimate is roughly 1 amp per 0.001 inch of mild-steel thickness for a single-pass MIG weld, though real joints need additional capacity and technique.
For example, a 1/8-inch plate is 0.125 inch thick. A rough starting calculation is:
0.125 × 1,000 ≈ 125 amps
That does not mean a welder set to exactly 125A will produce a sound weld. Joint access, travel speed, wire feed settings, and a safety margin matter. A 120V machine rated around 90–125A can handle 1/8-inch steel well when the joint is clean and fitted tightly. For 3/16-inch or 1/4-inch material, beveling and multiple passes become increasingly important, and 240V is usually the better electrical supply.
Ownership costs and maintenance realities
The welder is only part of the setup. A beginner buying a dedicated MIG machine should allow roughly $100–$250 for initial wire, contact tips, nozzles, anti-spatter supplies, and small accessories. Add a gas cylinder and regulator for solid-wire MIG; flux-cored wire avoids shielding gas but creates more smoke, slag, and cleanup.
Contact tips and nozzles are normally the first consumables to wear. Replace a tip when the wire drags, the bore becomes enlarged, or feeding becomes inconsistent. Keep the gun liner clean, remove spatter from the nozzle, and blow dust from the machine’s ventilation openings with the power disconnected and according to the manual.
Common mistakes include using a long lightweight extension cord, welding over paint or rust, setting wire speed without matching voltage, and exceeding the duty cycle. A 20% duty cycle at a stated amperage means approximately two minutes of arc time in a ten-minute period, followed by cooling time—not ten minutes of continuous welding.
Bottom line
Choose the Millermatic 142 for economical light work, the Millermatic 211 PRO for the best balance of portability and MIG capacity, the Multimatic 215 for MIG/TIG/stick flexibility, and the Multimatic 220 AC/DC when AC TIG and aluminum justify the added cost. For any 110v Miller welder, confirm the breaker requirement before purchase and plan around 1/8-inch steel as the comfortable everyday range on a household circuit.